


2-6
To set auto acquisition areas with
trackball
To set auto acquisition areas with
trackball:
1. Press the E, AUTO PLOT MENU key
to show the ARPA 1 menu.
2. Press the [2] key to select menu item
2AUT O ACQ AREA.
3. Further press the [2] key to select (or
highlight) SET option.
4. Press the ENTER key to conclude your
selection. At this point the AUTO ACQ
SETTING menu is displayed at the
screen bottom.
[AUTO ACQ SETTING]
1 [AUTO PLOT 1]
2 1/2
5. Press the [2] key to select menu item
21/2 and press the ENTER key . Then,
you will see the message as shown
below:
[AUTO ACQ SETTING]
1 [AUTO PLOT 1]
2 1/2
SET LEFT/RIGHT BOUNDARY
CANCEL PREVIOUS AREA: CANCEL KEY
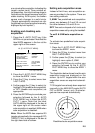
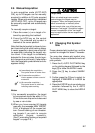
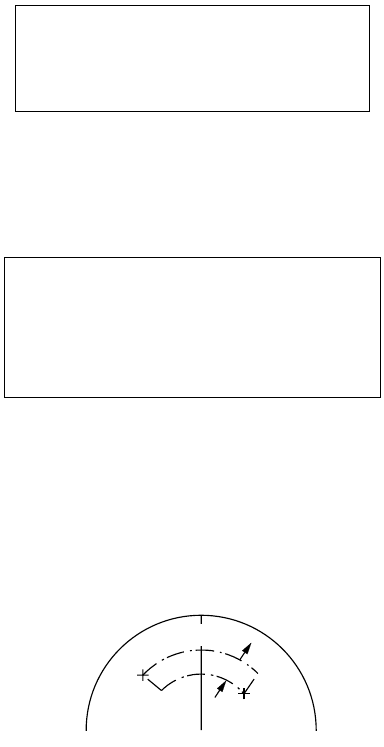
6. Place the cursor at the outer counter-
clockwise corner of the area (point A)
and press the ENTER key.
7. Place the cursor at the clockwise edge
of the area (point B) and press the
ENTER key.
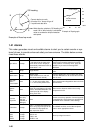
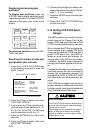
A
B
0.5 nm
Automatic acquisition area set by
trackball
Note: If you wish to create an auto
acquisition area having a 360-degree
coverage around own ship, set point B
in almost the same direction (approx.
±3°) as point A and press the ENTER
key.
8. Repeat steps 5 to 7 above if you want
to set another auto acquisition area with
the trackball.
9. Press the [1] key followed by the E,
AUTO PLOT MENU key to close the
ARPA 1 menu.
An auto acquisition area like the example
shown above appears on the display.
Note that each auto acquisition area has
a fixed radial extension (width) of 0.5 nm.
Note that the auto acquisition areas are
preserved in an internal memory of the
ARPA even when auto acquisition is dis-
abled or the ARPA is turned off.
Terminating tracking of targets
When the ARPA has acquired 20 targets
automatically, the message AUTO TAR-
GET FULL is displayed in the box at right-
hand side of the screen and no more auto
acquisition occurs unless targets are lost.
You may find this message before you set
an auto acquisition area. Should this hap-
pen, cancel tracking of less important tar-
gets or perform manual acquisition.
Individual targets
Place the cursor (+) on a target to cancel
tracking by operating the trackball. Press
the CANCEL key.
All targets
Press and hold the CANCEL key down
more than 3 seconds. In the automatic
acquisition mode, acquisition begins
again.
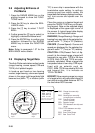
Discrimination between
landmass and true targets
A target is recognized as a landmass and
thus not acquired if it is 800 m or more in
range or bearing direction.