


Chapter 3: Operation 3-9
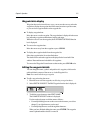
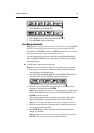
3. Select MORE to see more functions:
4. Select MORE again to return to the first level functions.
5. Press CLEAR to return to chart mode.
Creating a new route
Note: If there is a current route on screen, it is cleared when you select MAKE
ROUTE. If you are following the current route you are prompted to STOP
FOLLOW. Press ENTER to continue or CLEAR to abandon route creation. If
the route has not been saved you are prompted to save it.
You can add/remove waypoints in a route after you have finished making it,
either via the ROUTES function or via the cursor (see Editing a Route in the
following sections).
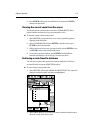
To make a new route by placing waypoints:
Note: You can pan the chart and change the scale whilst placing waypoints.
1. If necessary, move the cursor to the area in which you wish to make the
route and select a suitable chart scale.
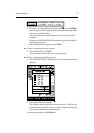
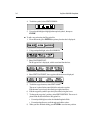
2. Select ROUTES then MAKE ROUTE. The MAKE ROUTE function is
replaced with PLACE WAYPOINT, together with help text:
3. Move the cursor to the position on the chart where you want your first
waypoint to be placed and press ENTER.
Note: You can position the cursor on an existing waypoint, if required; the
PLACE WAYPOINT function changes to USE THIS WAYPOINT . Press
ENTER to use the waypoint.
The waypoint appears on the screen at the cursor position. The number
displayed alongside the waypoint identifies its position in the route.
Note: If you Clear the route before it is saved, the waypoint is removed.
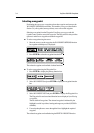
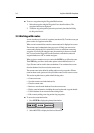
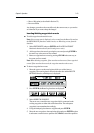
4. Move the cursor to the next waypoint position; a dotted line connects the
cursor to the last placed waypoint.
5. Press ENTER again. The next waypoint is placed and the dotted line
changes to a solid line.
Note: If you placed a waypoint incorrectly, you can delete it by pressing
CLEAR . Successive waypoints can be deleted in this way.