


Chapter 2: Getting Started 2-1
Chapter 2: Getting started
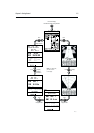
2.1 Introduction
This chapter provides information, instructions and a simple exercise to allow
you to practice using the RayChart 420 Chartplotter. It is intended to help you
become familiar with the controls before you start using the chartplotter for
routine navigation.
Note: There is often more than one method of performing a particular task.
Normal operating procedures are detailed in Chapter 3. When you become
familiar with the system you can adapt these procedures to suit your method of
operation.
Conventions used
Throughout this handbook, the dedicated (labelled) keys are shown in bold
capitals; for example, ENTER. The functions and options are shown in normal
capitals, eg. LIGHT.
Operating procedures, which may consist of a single key-press, or a sequence of
numbered steps, are indicated by a symbol in the margin.
When textual data is displayed on screen, any unavailable data is shown as
dashes, one per character.
Where procedures refer to Select, this implies using the trackpad to highlight a
function, then pressing the ENTER key to action that function.
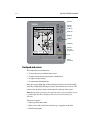
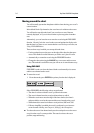
Simulator
The Chartplotter display unit includes a simulator mode, which allows you to
practice operating your chartplotter without data from a GPS system. You will
need to use the set up options to switch the display to simulator mode, as
described in Section 2.2, Switching on/off. You can use it in either of two ways:
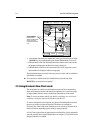
• Before the chartplotter has been installed on your vessel. In this case, you
only need to connect the Chartplotter display unit to a 12V dc power supply,
fused at 1A, connecting the red core from the power lead to positive (+) and
the black core to negative (-); see Chapter 5 for full details.
• After the chartplotter has been installed on your vessel, but while in the
marina or at anchor.