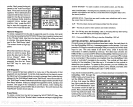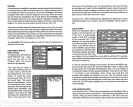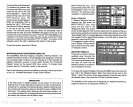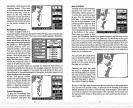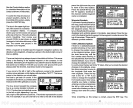
Tochangeanyoftheeefea-
__________________
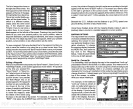
The statue of the DGPS re-
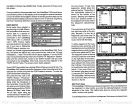
CURSOR
The
GlobalMap
1000
has
moveable cursor lines that
let
you pinpoint
locations on
the
map,
create
waypoints, routes,
and more.
There are two
ways
to activate
the cursor lines. The
first is to
press
the CURSOR
key.
The
second is to
simply press any
arrow
key
while the
map
is dis-
played. Eitherway, you'll
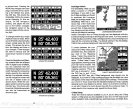
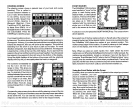
see a screen similar to the one above. When
first
turned
on,
the cursor lines intersect
your present position
on the screen.
The
latitudellongitude
box at the bottom of the screen
changes
from
your
present position
tothe
position
of the cursorlines on the screen
atthe same
time. The distance and
bearing
from the cursor lines to
your present
position
show next to the
position
at the bottom of the screen.
To move the cursor lines
anywhere
on the
screen,
simply press
the arrow
keys.
You can
press
two
keys
at the same time to move the cursor
lines
diagonally.
In
the screen shown
above,
the cursor lines are 1.08 miles and
149
degrees
from the
present position.
If
you press
the CENTER
key
while the cursor lines are
displayed,
the unit
will center the
map
at the
position
of the cursor lines
-
not the
present
position.
If
you
want the
GlobalMap
1000 to show
navigation
information
to the
cursor
lines,
first move the cursor lines to the desired
location,
then
press
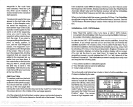
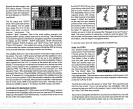
ceiver shows at the
top
of the
screen.
Beneath the status are
the station identification
(ID),
__________
station
frequency (Freq),
sta-
tion transmission rate
(Rate),
signal strength (Sig), signal-to-
noise ratio
(SNR),
and station
health
(HIth).
At the bottom of the screen are
the statistics for the GPS
receiver's five channels.
This includes the satellite number
(PAN),
its
status
(STAT),
the User Differential
Range
Error
(UDRE), Age
status
(Age),
and if Selective
Availablity (SA)
is on for each satellite. The UDRE
is the
range
error from
your position
to the satellite. If there is an "OK" in
this
field,
then the
range
errorto that satellite is8 meters or less 68
percent
of the time.
CUSTOMIZE SCREENS
The
digital displays
onthe
mapping, navigation,
and
steering
screens,
plus
the
displays
on the Plotterscreen can be
changed
as desired. To show how
this is
done,
we'll
use the
Navigation
screen as an
example.
To customize the
Navigation
screen,
first make certain it is
showing by pressing
the NAV
____________
key.
Next,
pressthe
MENU
key
two times. Now
press
the
key
nextto the "Customize
Display"
label at the
top
of
the screen.
_________ _________
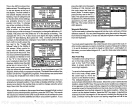
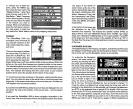
The
unit returns to the
Naviga-
j
tionScreenwithanarrowpoint-
L
ing
to the
top
left hand corner
X. T. B.
) (
Bearing )
[(
'AN. C.
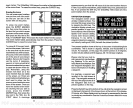
box as shown at
right.
In this
F___________ _______________________
case,
the arrow is
pointing
to
the D.T.G. box. The arrow identifies the box as
"ready
for
change."
To
move the arrow to a different
box,
simply press
the arrow
keys
until it's
pointing
to
the desired box. In this
example,
we'll
change
the distance to
go (DTG)
to the estimated time of arrival
(ETA) display.
With the arrow
pointing
to the "DTG"
box,
press
the ENT
key.
The screen shown atthe
top
of the next
page appears. Using
the arrow
keys,
move the arrow to the
"E.T.A."
box.
(If
the
digital
box
you
want is not on this
screen,
press
the
MENU
key
until
you
see it. There are four
pages
of different
digital
boxes
26
35
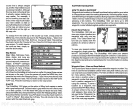
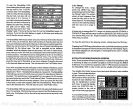
tures,
press
the MENU
key,
then
press
the
key
next to the
"Mapping Setup
label. Now
press
the
key
next to the
"C-
Map Setup
label. Thescreen
shown above
appears.
Simply
press
the
key
next to the
label
of the feature
you
wish
to
change.
When
you're finished,
press
the CLR
key
to return to
the
map
screen or
press
the
key
next to the "More"
label to
Nap
Boundaries
n
OFF
ION
%tvigation
Aids o OFF ION
ttal_Features
o
jBestrlctiuns
Areas
ci
OFF
ION
!I
(Depth
Lines
ci
OFF
ION
More
return to the
mapping setup
menu.
if__
I1
293.0 RHz
tfl
25
FF3
'It
4iion
Dispic
.—4lrress
MENU
ke!
help.
0. T. C. C. 0. C.
3.15,
3.0. C.
186°T 12.0
MPH
000MI 184°T 12.0MPH
PDF compression, OCR, web-optimization with CVISION's PdfCompressor


