when
you
reach
the last
way-
point
in the
route,
the arrival
alarm sounds until
you
turn it
off.
k
[Route
Auto—Sequence o
DPI'
ION
]
After
you
decide which direc
________
______
______
tion to run the
route,
a new
______ __________ _____
menu
appears
as shown at
right.
____________
This is the
auto-sequencing
_____
__________________
menu. With
auto-sequencing
____________
turned on
(the default),
the
_______
GlobalMap
will show
naviga-
tion data to the first
waypoint
in the route until
you
come within 0.10
mile
of the
waypoint.
This distance is the
sequencing
radius. As soon as this
happens,
the
GlobalMap
1000 sounds
atone,
letting you knowthatyou
are
within
0.10
mile of the
waypoint's
location. It then
automatically
switches
to the next
waypoint
in the
route,
showing navigation
to the second
waypoint
location. This
process repeats
until the route is
completed.
When
you
arrive at the last
waypoint
in the
route,
the
GlobalMap
1000 sounds a
tone
continuously
until
you
turn the tone off.
If
you
turn
auto-sequencing off,
the
GlobalMap
1000 won't au-
I
tomatically
switch to the next
waypoint
after
arriving
at a
way- ____________________________
point.
Instead,
once
you
arrive
______________________________
at a
waypoint, you'll
need to
press
the WAYPT/ROUTE
key,
__________________________
then
press
the
key
next to
the
______________________________
"Advance Route to Next
Way-
'
point"
label as shown on
the
screen at
right.
To
change
the
sequencing
radius,
(distance
from the
waypoint
that will
signal
the
sequencetone
and
changeto
the
nextwaypoint
in a
route) press
the
key
next to
the
"Sequencing
Radius" label. Now enter the desired
radius
using
the numbered
keys.
Press the ENT
key
when
you're
finished
or the CLR
key
to
exit without
changing
the radius.
The
auto-sequencing
menu can also be found
by
first
pressing
the
WAYPT/ROUTE
key,
then the
key
nexttothe "Routes" label.
Finally, press
the
key
next to
the
"Setup
label. The
auto-sequencing
menu shown at
the
top
of this
page appears.
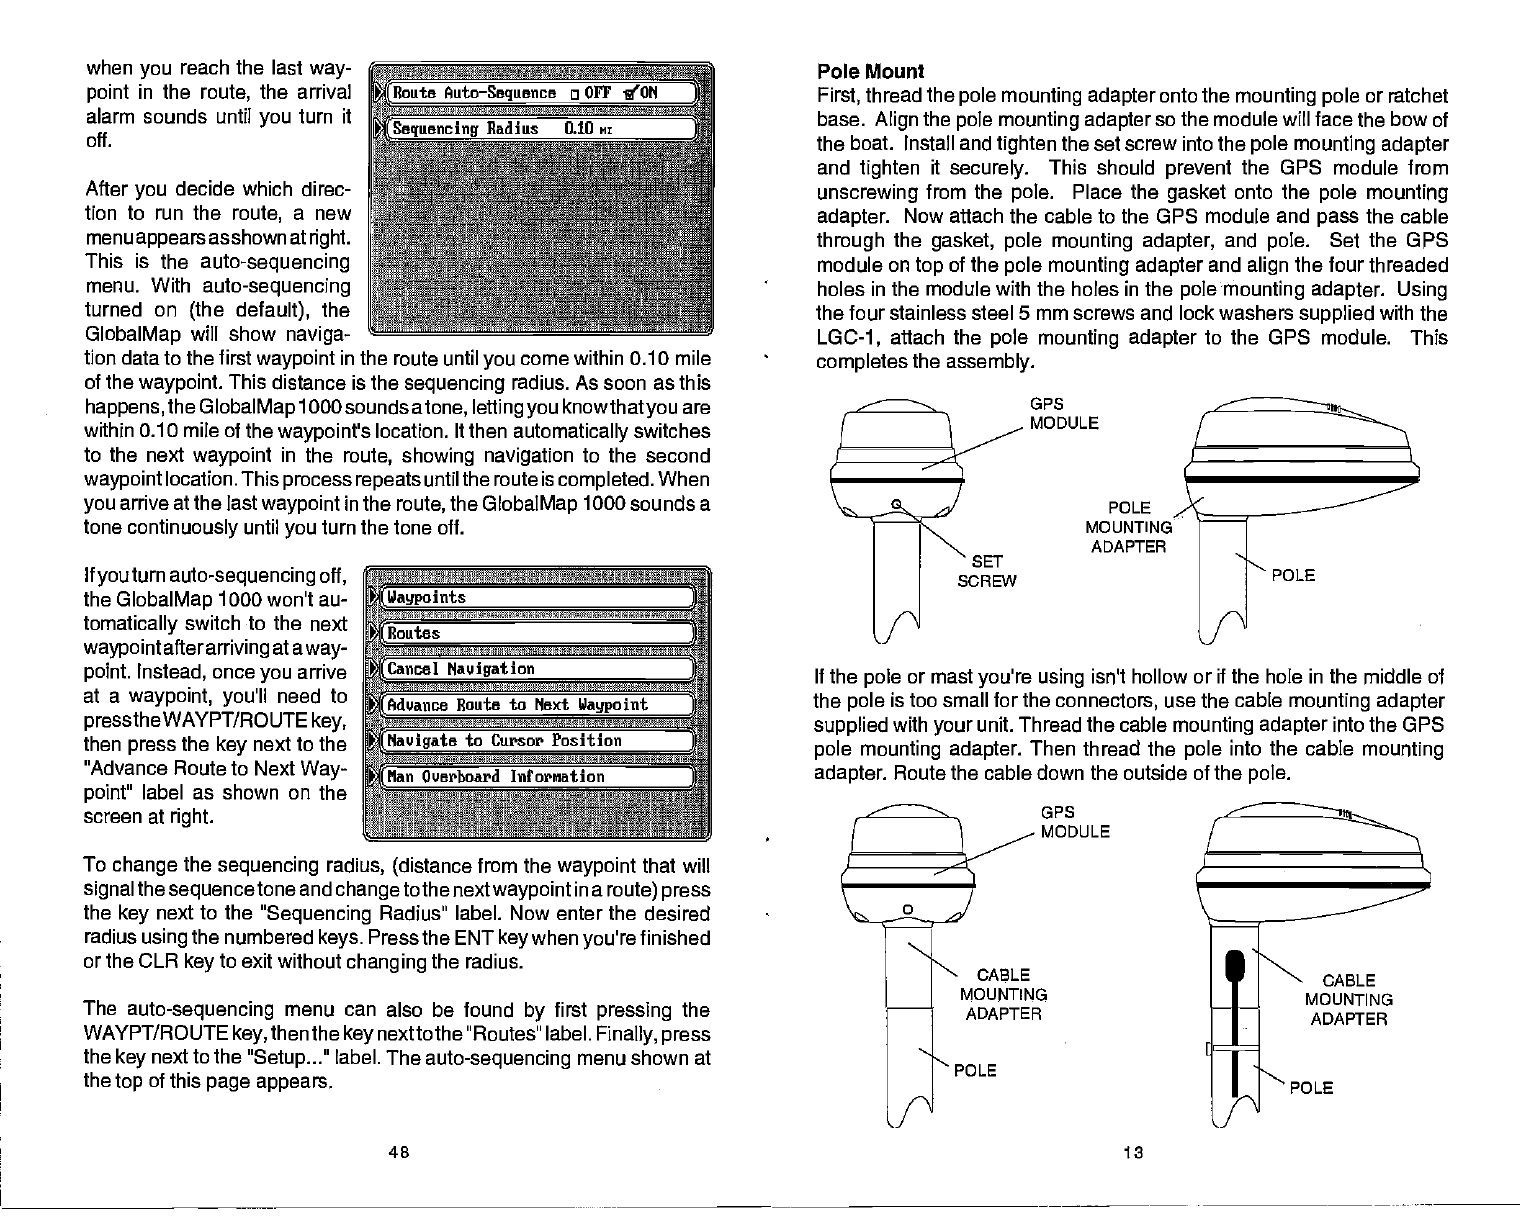
Pole Mount
First,
thread the
pole mounting adapter
onto
the
mounting pole
or
ratchet
base.
Align
the
pole mounting adapter
so the module will face the bow
of
the boat. Install and
tighten
the set screw into the
pole mounting adapter
and
tighten
it
securely.
This
should
prevent
the
GPS module from
unscrewing
from the
pole.
Place the
gasket
onto the
pole mounting
adapter.
Now attach the cable to the OPS module and
pass
the cable
through
the
gasket, pole mounting adapter,
and
pole.
Set
the
GPS
module on
top
of the
pole mounting adapter
and
align
the four threaded
holes in the module with the holes in the
pole mounting adapter. Using
the four stainless steel 5 mm screws and lock washers
supplied
with
the
LGC-1,
attach the
pole mounting adapter
to the OPS module.
This
completes
the
assembly.
If the
pole
or mast
you're using
isn't hollow
or if
the
hole in the
middle of
the
pole
is too
small for
the
connectors,
use the
cable
mounting adapter
supplied
with
your
unit. Thread the cable
mounting adapter
into the GPS
pole mounting adapter.
Then thread the
pole
into the
cable
mounting
adapter.
Route the cable down the outside of the
pole.
GP5
MODULE
GP5
MODULE
POLE
SET
ruaypo
juts
Jioutes
rcancel Navigation
Advance Route to Next
Waypo
jut
Navigate
to Cursor Position
Man Overboard Information
scREw
ADAPTER
POLE
CABLE
MOUNTING
ADAPTER
POLE
CABLE
MOUNTING
ADAPTER
48
13
POLE
PDF compression, OCR, web-optimization with CVISION's PdfCompressor
