56
Reference
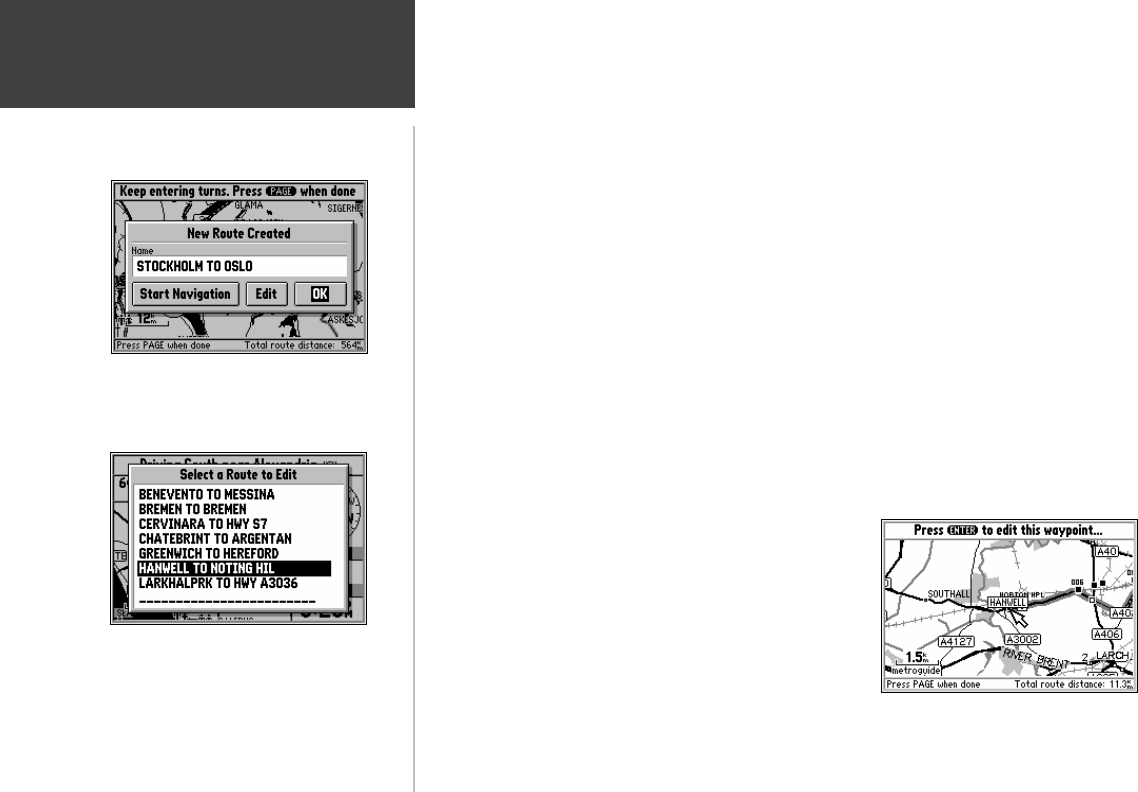
Editing an Existing Route
7. When all the desired points have been added to the route, press the PAGE key. The ‘New Route
Created’ box is shown with an assigned name for the new route (Refer to the top left picture).
8. To change the name of the route, highlight the name and press the ENTER key to edit it (Refer
to page 11 for information on how to make a character entry).
9. If you are ready to use the route for driving guidance, highlight Start Navigation and press the
ENTER key. For more information, refer to the “Driving on a Route” section on page 60.
10. To add, remove, or move points along the route, highlight Edit and press the ENTER key.
11. To approve the route without using it for driving guidance, highlight OK and press the ENTER key.
To edit an existing route:
1. Press the ROUTE key to view the Route menu.
2. Highlight Edit Route and press the ENTER key. A box comes on the screen with a list of the
routes stored in the StreetPilot’s memory (bottom left picture).
3. Select the desired route and press the ENTER key.
The screen displays a full-screen map with a
panning arrow (bottom right picture).
4. Use the ROCKER keypad to move the panning arrow to
highlight a route line (if you would like to insert a new
turn) or a waypoint on the route (if you would like to
move or remove that turn).
Editing Route Points
“New Route Created” Box
Editing an Existing Route
As you are creating and editing routes, the top of the screen prompts you for what to do next
(bottom right picture).


