


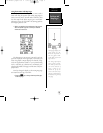


Marking a Position
Now that you’ve acquired a position, let’s mark it as a
waypoint for future reference.
1.
Press
the
K
key
to capture and hold your posi-
tion.
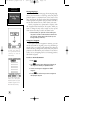
To mark a position, you must have obtained a 2D or 3D
fix, or have the receiver in simulator mode. If you try to
mark a position without a position fix, you will be alerted
with a ‘No Position’ message.
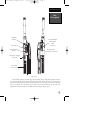
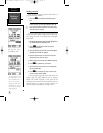
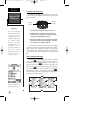
The mark position page will appear, showing the cap-
tured position and a default 3-digit waypoint name, 001.
Let’s change the name to something more meaningful,
like ‘HOME’.
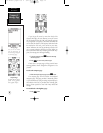
1.
Use the arrow keypad to move the field highlight from
the ‘SAVE?’ field to the ‘Waypoint’ field.
2.
Press
E
and the left arrow key to clear the
default waypoint name.
3.
Press and hold the up arrow key
t
o scroll through the
alphabet until the letter ‘H’ appears.
4. Press the right arrow key once to move the character
highlight to the next character space.
5. Repeat steps 3 and 4 until the word ‘HOME’ is displayed.
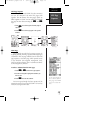
6. Press
E
to complete entry of the name.
7. Press the down arrow key once to return the field high-
light to the ‘SAVE’ field.
8. Press
E
to confirm that you want to save the posi-
tion as a waypoint named ‘HOME’.
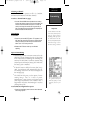
The mark position page will now be replaced by the
position page (the page displayed prior to pressing
MARK. The ‘HOME’ waypoint is now stored in the
GPSCOM 170’s memory, and will remain there until you
manually remove it or clear the receiver’s memory. For
more on waypoint management, see pages 22-28.
To save a waypoint with the
three digit name, simply
press ENTER on ‘SAVE’.
Marking a
Position
Getting
Started
8
!
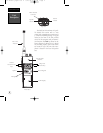
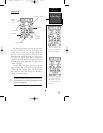
The arrow keypad is used
for all data entry. Use the
UP and DOWN keys to
select letters, numbers, or
menu options; use the LEFT
and RIGHT keys to move
the cursor forward or back-
ward along the line.
170 manual pages rev D 9/21/98 9:23 AM Page 8