


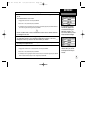
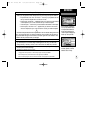

4. Place the adhesive side of the smooth piece of Velcro on the bottom of the bracket
(inside the large rectangular recessed area), and press into place.
5. Mount the bracket in place by placing one piece of Velcro on top of the
other.
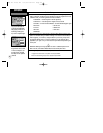
To insert the GPS III Pilot into the bracket:
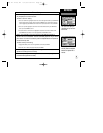
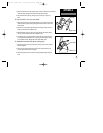
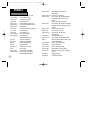
1. Remove the upper half of the mounting bracket by unscrewing the pivot knob
(shown at bottom right) and sliding the upper bracket off the pivot pins of the
lower bracket.
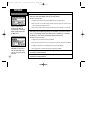
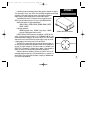
2. Mate the two clips (opposite the thumb tab) on the upper bracket with the
notches on the bottom of the GPS IIIPilot.
3. Rotate the GPS IIIPilot into place in the upper bracket and snap the thumb
tab clips into the notches on the top of the GPS IIIPilot.
4. For additional security, place the 3mm locking knob into the hole at the rear
of the upper bracket and GPS III Pilot. (Use only the knobs supplied. Using
incorrect hardware may damage the mount and/or GPS IIIPilot.)
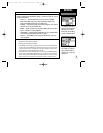
To reassemble the bracket and adjust viewing angle:
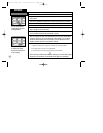
1. Match the pin holes on the upper bracket with the pins on the lower bracket
and slide together.
2. Place the pivot knob through the side of the lower bracket and the screw
into the upper bracket, but do not tighten.
3. Rotate the upper bracket to the desired viewing angle and tighten the pivot
knob.
89
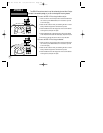
APPENDIX A
Mounting Instructions
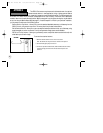
Thumb Tab
Upper Bracket
Pivot Knob
Lower Bracket
GPS III Pilot B2 4/1/99 2:02 PM Page 89