


24
Using the Project feature, the eTrex can create a new waypoint at a specified distance and
bearing using an existing waypoint as a reference. You can change the name, symbol, and
elevation of the new waypoint on this page.
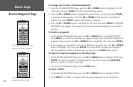
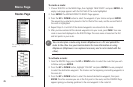
To project a waypoint:
1. Select a waypoint on the WAYPOINT PAGE and press ENTER.
2. Press the
UP or DOWN button to highlight ‘PROJECT’, then press ENTER. The PROJECT
WAYPOINT Page is displayed and a numeric name is assigned to the new waypoint.
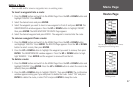
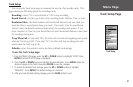
3. The distance field is highlighted by default. Press
ENTER to display the EDIT NUMBER
page.
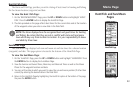
4. With the EDIT NUMBER Page displayed, press the DOWN
button to move the highlight to
the next number in the field. With the desired digit selected, press
ENTER to activate the
drop down number list.
5. Press the
UP or DOWN button to select the correct number, then press ENTER. When all
numbers are entered correctly, highlight ‘OK’ and press
ENTER.
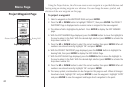
6. With the PROJECT WAYPOINT page displayed, press the DOWN
button to highlight the
bearing field, then press
ENTER to display the EDIT ANGLE Page.
7. With the EDIT ANGLE Page displayed, press the DOWN
button to move the highlight to
the next number in the field. With the desired digit selected, press ENTER to activate the
drop down number list.
8. Press the
UP or DOWN button to select the correct number, then press ENTER. When all
numbers are entered correctly, highlight ‘OK’ and press ENTER.
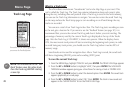
9. The name, symbol, and elevation can be changed on this page as well. When all changes
have been made, highlight ‘OK’ and press
ENTER to save the waypoint. Highlight ‘GOTO’
and press ENTER to save the waypoint and begin direct navigation to the point.
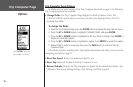
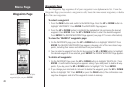
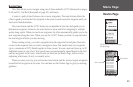
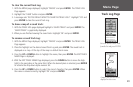
Project Waypoint Page
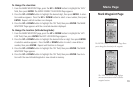
Edit Number Page
Project Waypoint Page
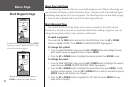
Menu Page
Distance Field
Bearing Field