5–3
Setting destination through
waypoint list
Note: A waypoint must exist to set it as des-
tination. When a waypoint does not exist, the
buzzer sounds and the message shown in Fig-
ure 5-10 appears.
No waypoint data
Figure 5-10
Destination waypoint can be set through the
waypoint list two ways:
• By entering waypoint number, and
• By selecting waypoint by cursor
1) Press the [GOTO] key.
2) Press [3] to display the Waypoint List.
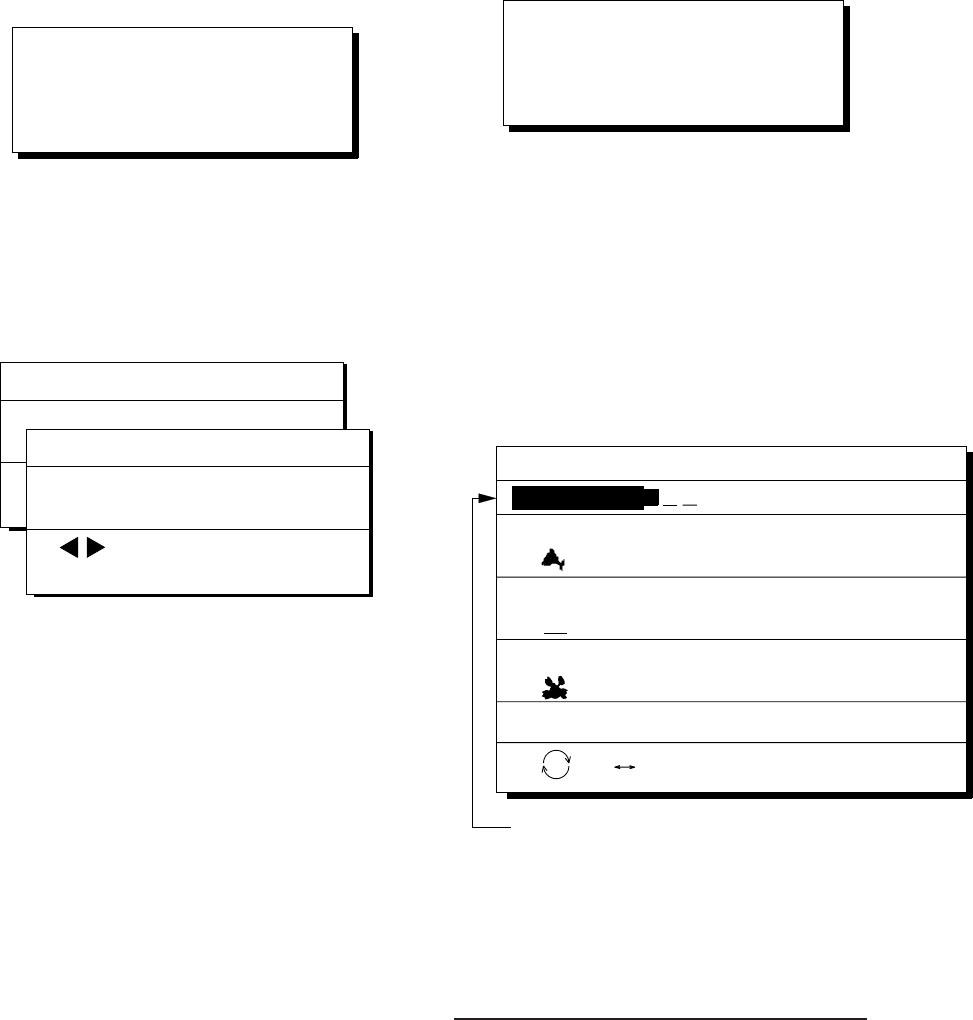
Waypoint
No.
GOTO (Waypoint List)
ENT:Enter
001 34° 12.345' N 132° 23.456' E
MARINE POINT AUG 12' 95 12:35U
002 ° 12.345' N 133° 12.345' E
A POINT AUG 13' 95 13:28U
005 41° 34.567' N 135° 23.456' E
B POINT AUG 14' 95 09:45U
No
.
List
Waypoint No.
Waypoint number can be entered here
when this line appears in reverse video.
Figure 5-11 Waypoint list
Set destination by following 1 or 2 below.
1 1
1 1
1 Setting destination by waypoint no.
3) Enter waypoint number, in three digits.
You can clear entry by pressing the
[CLEAR] key.
4) Press the [NU/CU ENT] key.
Own ship position becomes starting point and
a dashed line runs between it and the waypoint
selected.
Setting destination by MOB
position or event position
Note: This operation cannot be performed
when there is no MOB position or event posi-
tion. The buzzer sounds and the message
shown in Figure 5-8 appears to alert you when
there is no MOB position or event position.
No MOB/event data in memory
Figure 5-8
1) Press the [GOTO] key.
2) Press [2] to select MOB/Event Position.
The display shown in Figure 5-9 appears.
ENT:Enter
MENU:Escape
[MOB] Displaying MOB data
34° 12.345' N 130° 23.456' E
:Recall
AUG 12' 94 19 : 25U
ENT: Enter
MENU: Escape
[#01] Displaying event data
34° 12.345' N 130° 23.456' E
: Paging
AUG 12' 95 19 : 25U
Figure 5-9
3) Press t or s to select MOB position or
event position. The MOB position appears
first. To select event position, press s. If
selected position is within the current dis-
play range, the cursor marks the position.
(The cursor does not appear on the High-
way, Navigation and Data displays.)
4) Press the [NU/CU ENT] key. A flag ap-
pears at position selected if it is within the
current display range. A dashed line con-
nects between own ship and MOB posi-
tion or event position.
When destination is cancelled, dashed lines
are erased but flags remain on the screen.


