02 Instruments and controls
48
Left-hand stalk switch
02
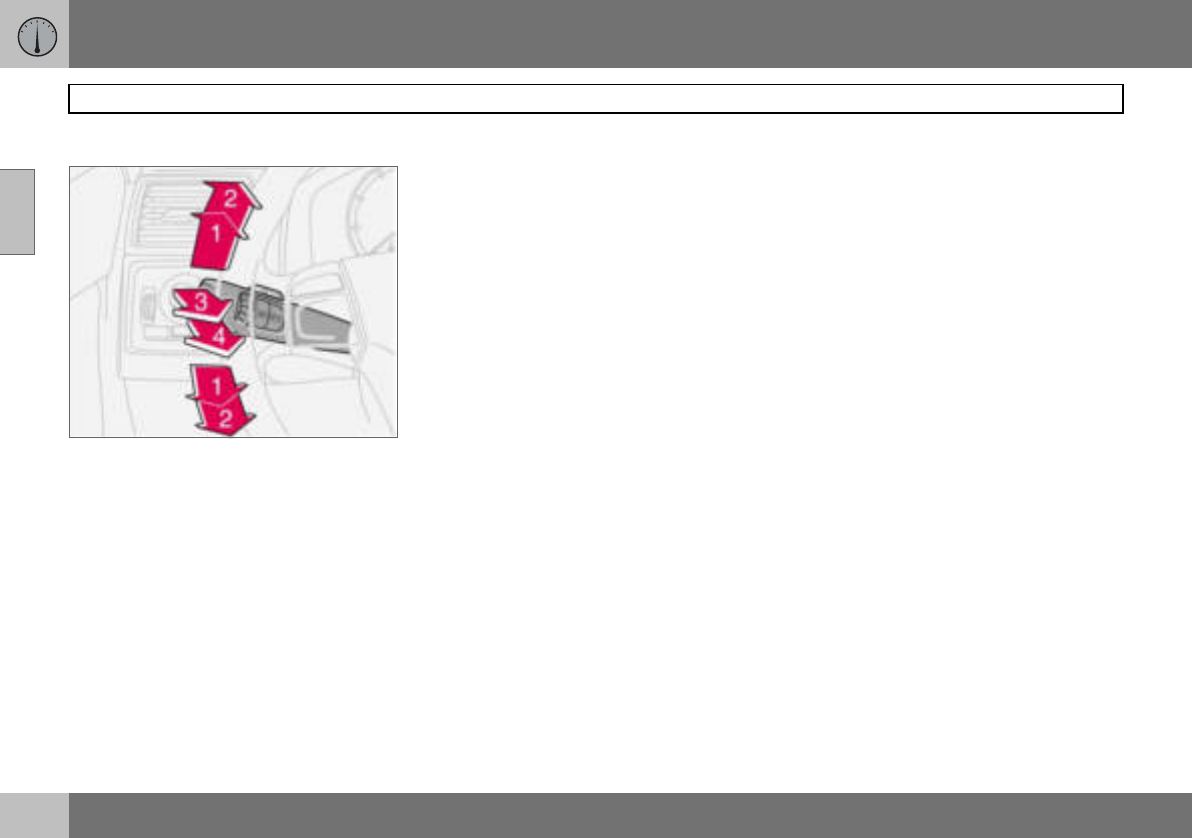
Stalk switch positions
1. Short flash sequence, direction indicators
2. Continuous flash sequence, direction
indicators
3. Main beam flash
4. Switching, main and dipped beam, and
home safe lighting
Direction indicators
Continuous flash sequence
– Move the stalk switch up or down to end
position (2).
The stalk switch remains in its end position
and is moved back manually, or automatical-
ly by steering wheel movement.
Short flash sequence
– Move the stalk switch up or down to
position (1) and release.
The direction indicators flash three times and
the stalk switch returns to its home position.
Switching, main and dipped beam
The ignition key must be in position II for
main beam to be switched on.
– Turn the headlamp control clockwise to
the end position, see page 46.
– Move the stalk switch towards the steer-
ing wheel to the end position (4) and re-
lease.
Main beam flash
– Move the stalk switch gently towards the
steering wheel to position (3).
Main beam comes on until the stalk switch is
released.
Home safe lighting
Some of the exterior lighting can be kept
switched on to work as home safe lighting af-
ter the car has been locked. The standard
delay is 30 seconds
1
, but can be changed to
60 or 90 seconds, see page 65.
– Remove the key from the ignition switch.
– Move the stalk switch towards the steer-
ing wheel to the end position (4) and re-
lease.
– Get out of the car and lock the door.
1
Factory settings.


