Unit 3: Installation
Lt408 Operator Manual
3-6 PN: 9001152A
MEDIA LOADING
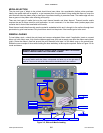
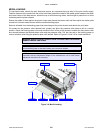
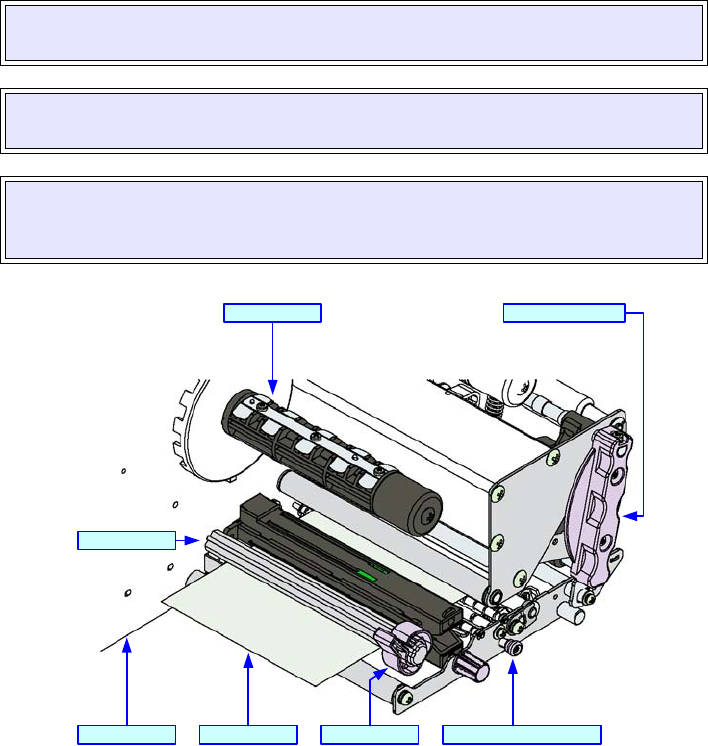
To load label media, unlatch the print head and remove any remnants that may exist of the prior media supply.
Feed the free end of the media from the printer’s left side, beneath the shaft of the media guide, between the upper
and lower halves of the label sensor, across the top of all forthcoming rollers, and through to protrude six or more
inches beyond the printer chassis.
Ensure the media is flush against the printer’s back side (toward the center wall) and then adjust the media guide
inward until it almost makes contact with the media’s backing paper.
Remove all labels from the backing paper that extend beyond the printer chassis and relatch the print head.
Lift upward on the pressure roller release knob (purple) and allow the pressure roller plate to fall to a vertical
position. Route the backing paper’s free end around the front of the printer chassis, beneath the front platen roller
and onward between the second platen roller and the pressure roller. Pull the free end of the backing paper to
remove all slack while lifting the pressure plate until latched. Refer to Figures 3-5 and 3-6 for visual assistance.
Figure 3-6, Media Loading
WARNING: AVOID PHYSICAL CONTACT WITH THE PRINT HEAD TO PREVENT
BURNED FINGERS AND HANDS.
NOTE: Properly installed label media will be oriented so that the label side is upward
and the backing paper is downward resting upon the printer chassis.
NOTE: Refer to the Printer Configuration unit of this manual for media configuration
instructions and the Adjustment chapter of the Maintenance unit for label sensor
adjustment instructions as necessary.
Label Media Media GuideCenter Wall
Guide Shaft
Ribbon Boss
Pressure Roller Release
Print Head Latch


