


45
S4359146
6.
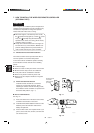
HOW TO INSTALL THE WIRED REMOTE CONTROLLER
(
OPTIONAL PART
)
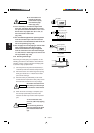
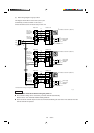
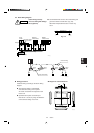
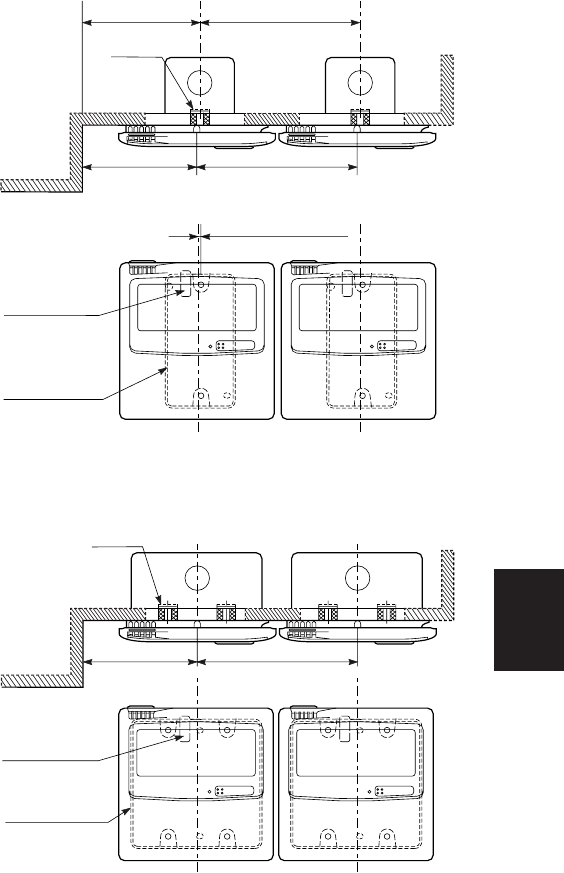
Fig. 6-2
66
66
6
RC
(WD)
1987_C_I
3-21/32 in. or more
Spacer
Wall
3/32 in.
(amount offset from JIS box)
Hole for routing
remote control
cable
3-17/32 in. or more
4-29/32 in. or more
4-29/32 in. or more
(from wall)
(during continuous
installation)
(from wall)
(during continuous
installation)
JIS CB8340
One switchbox
(no cover)
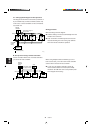
1988_C_I
Spacer
Wall
Hole for routing
remote control
cable
3-17/32 in. or more
4-29/32 in. or more
(from wall)
(during continuous
installation)
JIS CB8340
Two switchbox
(no cover)
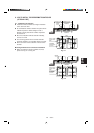
Fig. 6-1
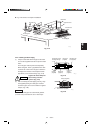
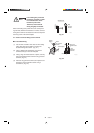
6-1. Installation site selection
● Install the remote controller at a height of between
3–5 ft. above the floor.
● Do not install the remote controller in a place where
it will be exposed to direct sunlight or near a
window or other place where it will be exposed to
the outside air.
● Be sure to install the remote controller vertically,
such as on a wall.
● The mounting position for the remote controller
should be located in an accessible place for control.
● Never cover the remote controller or recess it into
the wall.
Mounting dimensions for continuous installation
● When mounting the remote controller on a wall,
please see Fig. 6-1 and Fig.6-2.