


Page
8. HOW TO INSTALL THE WEEKLY TIMER
(OPTIONAL PART) ................................................... 65
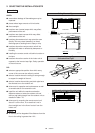
8-1. Mounting Dimensions for Continuous Installation
8-2. When Using a Wall Box for Flush Mounting
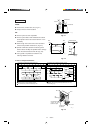
8-3. Wiring Diagram
8-4. Test Run Setting
8-5. Memory Back Up Function for Power Failure
Compensation
9. HOW TO INSTALL THE SYSTEM CONTROLLER
(OPTIONAL PART) ................................................... 67
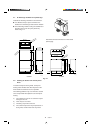
9-1. System Controller Installation
9-2. Electrical Wiring
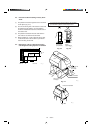
9-3. Address Switch Setting
9-4. Mode Setting
9-5. How to Perform Zone Registration
9-6. Connection with Other Equipments
9-7. Memory Back Up Switch
9-8. Test Run
10. HOW TO PROCESS TUBING .................................. 79
10-1. Use of the Flaring Method
10-2. Flaring Procedure with a Flare Tool
10-3. Precaution before Connecting Tubes Tightly
10-4. Precautions during Brazing
10-5. Connecting Tubing between Indoor and Outdoor
Units
10-6. Insulating the Refrigerant Tubing
10-7. Taping the Tubes
10-8. Finishing the Installation
11. AIR PURGING .......................................................... 82
12. TEST RUN ................................................................ 85
12-1. Preparing for Test Run
12-2. PCB Setting
12-3. R.C. Address Setting Method
12-4. Automatic Address Setting Method
12-5. Displaying Indoor / Outdoor Unit Combination
Numbers
12-6. Test Run Procedure
12-7. Items to Check Prior to Test Run
12-8. The Main Alarms of Mis-wiring & Mis-setting
12-9. The Main Alarms of Unit Troubles
12-10
. The Main Alarms of Power Supply Troubles
13. PUMP DOWN............................................................ 93