


82
To start a new scouting session:
1. From the Map page, press
MENU|↓ to SCOUTING|ENT|ENT.
2. If you have not created a scout plot before, highlight New Scout and
press
ENT. Scout 1 will appear in the scout plot list below. Select Scout
1 and Press
ENT.
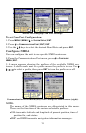
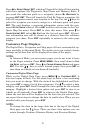
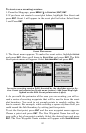
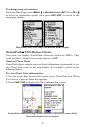
Scout Plot menus.
3. The Scout menu appears. To make the scout active, highlight ACTIVE
and press ENT, then scroll down to SCOUT END and press ENT. The Edit
Scout points menu will appear. Select
ADD FROM MAP and press ENT.
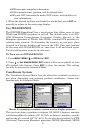
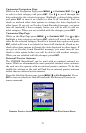
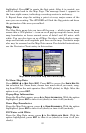
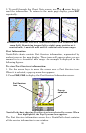
An active scouting session (left), denoted by the checkbox next to Ac-
tive. Scout end selected on Scout menu (center). Add from Map high-
lighted on the Edit Scout points menu (right).
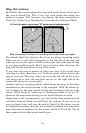
4. As you walk the perimeter of the area you are scouting, you will re-
cord a series of scouting waypoints that will be used to draw the scout
plot boundary. You need to set enough points to roughly outline the
area's corners. For example, while scouting a square soybean field you
could record the field boundary by setting just four points.
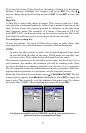
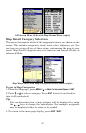
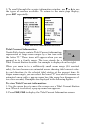
To set the first point, press
ENT and the new waypoint menu appears.
Choose a point and press
ENT. The New Waypoint Name box will ap-
pear with a list of waypoint symbols. Select the desired icon and press
ENT. The New Waypoint Name window will appear with SAVE WAYPOINT