


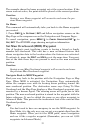

35
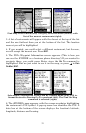
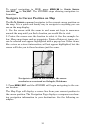
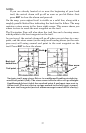
The 15-mile zoom figure (left) shows the course line connecting your
current position to your destination. The 60-mile zoom (center) shows
both current position and destination on screen. The Navigation Page
(right) will also show navigation information.
To stop navigating to the cursor, use the Cancel Navigation command:
press
MENU|↓ to CANCEL NAVIGATION|ENT|← to YES|ENT. The iFINDER
stops showing navigation information.
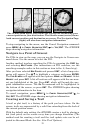
Navigate to a Point of Interest
For POIs in view on the map, you can use the Navigate to Cursor com-
mand above. Use the cursor to select the POI.
Another method involves searching for POIs by pressing the
FIND key
and selecting
MAP PLACES. (For instructions on POI searches, see the
searching example earlier in this section or turn to Sec. 6, Searching.)
After you have selected
MAP PLACES and pressed ENT, a list of map cate-
gories will appear. Use ↓ ↑ to highlight a category and press
ENTER.
The
FIND BY MENU will appear with two options: NAME and NEAREST. Select
NEAREST and press ENT. A list of locations will appear with the one near-
est you highlighted at the top. Press
ENT, which will launch the way-
point information screen. The
GO TO command will be highlighted at
the bottom of the screen, so press
ENT. The iFINDER begins showing
navigation information to the item.
To cancel navigation, press
MENU|↓ to CANCEL NAVIGATION|ENT|← to
YES|ENT. The iFINDER stops showing navigation information.
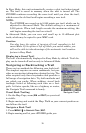
Creating and Saving a Trail
A trail or plot trail, is a history of the path you have taken. On the
screen, trails are represented by a solid line extending from the back of
the current position arrow.
With the default auto setting, the iFINDER creates a trail by placing a
dot (trail point) on the screen every time you change directions. (The
method used for creating a trail and the trail update rate can be ad-
justed in Advanced Mode. See Sec. 5 for Trail Options.)