


11.20
Section 11
Reassembly
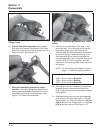
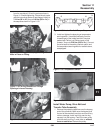
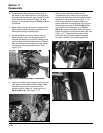
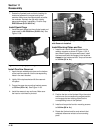
NOTE: When installation is complete, the tangs
of the two hose clamps must be down
toward the crankcase, away from the
flywheel and below the adjacent flange of
the lower blower housing. See Figure
11-66.
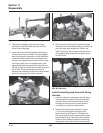
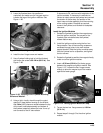
10. Install the drive belt onto the cogged pulley of the
water pump, then around the cam pulley. Slide the
cam pulley with the belt attached, down onto the
keyway end of the camshaft. Be careful not to
push the key out of the keyway, and/or into the
seal, when installing the pulley.
NOTE: A mark or dab of paint applied to the top
of pulley indicating the keyway location
will aid installation.
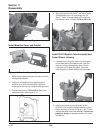
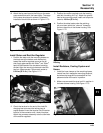
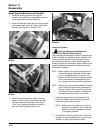
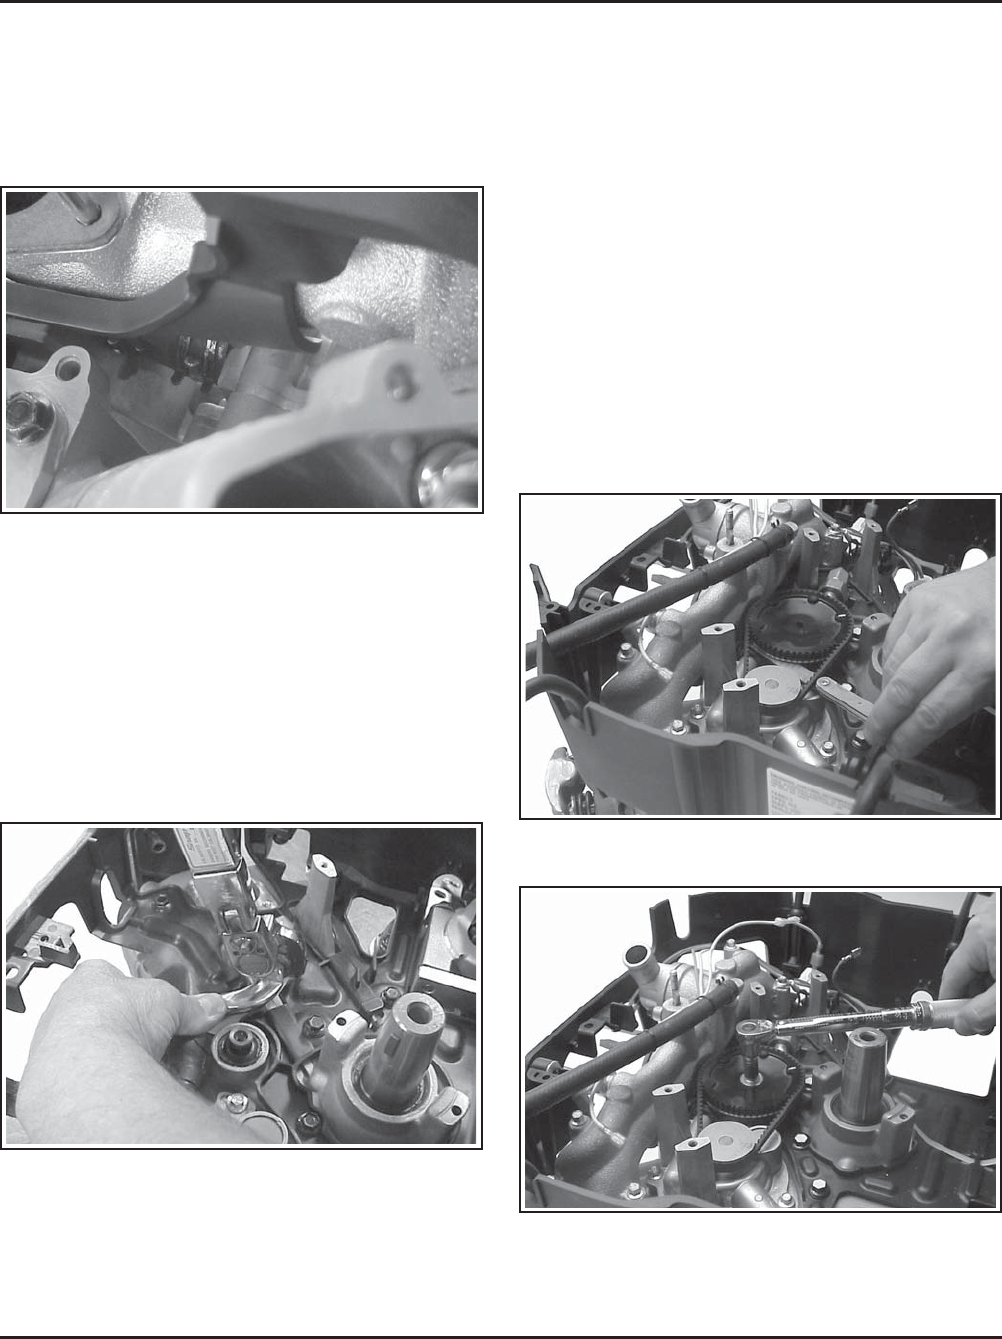
11. Check that there is at least 3 mm (1/8 in.)
clearance between the underside of the pulley,
and the hose, tube, clamp assembly. See Figure
11-68. Remove the pulley and reposition the tube
or clamps if required. Install the flat washer and
hex. flange screw to secure the pulley in place.
Torque the screw to 9.9 N·m (88 in. lb.). See
Figure 11-69.
Figure 11-68. Checking Clearance of Pulley with
Feeler Gauge.
Figure 11-66. Tang Orientation of Clamps.
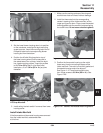
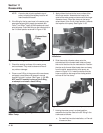
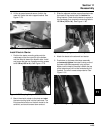
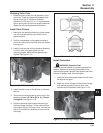
9. Push down on the formed tube and hold in this
position to prevent it from pivoting upward when
tightening the hex. cap. Torque the hex. cap
portion of fitting to 22.6 N·m (200 in. lb.), to
secure the joint connection and lock ferrule to
tube. Support the fitting with a wrench while
tightening the cap, to prevent applying
unnecessary pressure on fitting and joint. See
Figure 11-67. Check that the formed tube and
hose section to pump have not been pulled up.
Figure 11-67. Torquing Cap Nut.
Figure 11-69. Torquing Mounting Screw of Cam
Pulley.