


11.7
Section 11
Reassembly
11
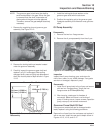
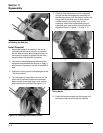
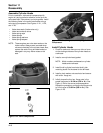
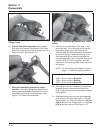
Figure 11-17. Applying Loctite to New Stud.
2. Tighten two nuts together on the shorter threaded
section.
3. Thread the end of the stud with the Loctite
®
into
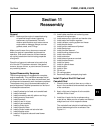
the crankcase, until an exposed stud height of
75 mm (2.952 in.) is obtained. The end with the
dash mark must be out. See Figure 11-18. When
threading in the studs, use a steady tightening
motion without interruption until the proper
height is obtained. The frictional heat from the
engaging threads, may otherwise cause the
locking compound to set up prematurely.
Remove the two nuts.
Apply
Loctite
®
No. 272
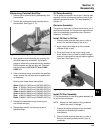
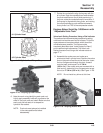
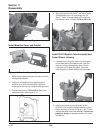
Figure 11-18. Side View of Crankcase and Studs
for Height Dimension/Reference.
4. Repeat Steps 1-3 for each of the studs.
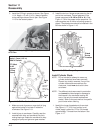
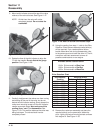
Install Hydraulic Lifters
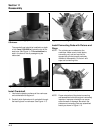
1. Bleed the hydraulic lifters of internal oil so the
plunger in the lifter can be depressed by hand.
Use an old cutoff push rod mounted in a drill
press, arbor press, or vice, and slowly apply
pressure two or three times to bleed the lifters.
See Figure 11-19. If a vice is used in bleeding
the lifters, be sure to install protective coverings
over the jaws to avoid damage to the base of
the lifter(s).
Figure 11-19. Push Rod Tool.
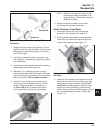
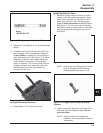
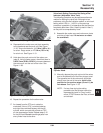
NOTE: Another tool for bleeding may be made
from an old tappet and ball bearing
welded together. See Figure 11-20.
Figure 11-20. Tappet and Ball Bearing Welded
Together.
2. Lightly lubricate the bottoms of the lifters with oil
and install into their respective bores. Do not
prime the lifters.
NOTE: Hydraulic lifters should always be
installed in the same position as before
disassembly.