49
eTrex Vista C
GPS Navigation
Using Routes
Creating and Using a Route
With routes, you can create a sequence of intermediate waypoints that lead
you to your fi nal destination. The eTrex Vista C stores 50 routes, with up to
250 waypoints each. A route can be created and modifi ed from the Routes
Page, and waypoints can be added to a route from the Find Menu. More com-
plex routes can be created using a PC and MapSource mapping programs and
then transferred to the unit memory. Auto-Routes which are generated when
you select “Go To” for a Find item, map item or waypoint cannot be saved.
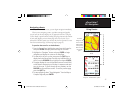
To create and save a route:
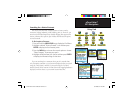
1. Access the “Routes” page from the Main Menu. The page has a
“New” button, an “Active” button and a list of saved routes.
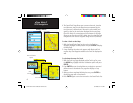
2. Use the ROCKER key to highlight the “New” button and press
ENTER to display the route Setup Page.
3. With an empty row (dashed) in the route list highlighted, press
ENTER to display the Find Menu.
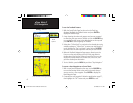
4. Use the Find Menu to select a route waypoint from one of the
Find Menu groups and display the Information Page for the
selected waypoint, city, exit, point of interest, etc. Highlight
the on-screen ‘Use’ button and press ENTER to place it on the
Route Waypoint List.
5. To add more waypoints to the route, repeat the process in Steps
3 and 4. You can rename the route if desired.
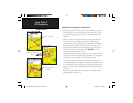
6. Press QUIT to save it to the Saved Routes list, highlight the
“Navigate” button and press ENTER to navigate.
List of Saved Routes
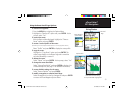
Route Setup Page Active Route Page
when following roads
Indicates
Active Route
Options
Menu
Active Route Page
when Off Road
eTrex Vista C Owner's Manual Text.indd 49 8/12/2004, 9:17:18 AM


