


45
eTrex Vista C
GPS Navigation
Using Tracks
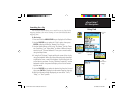
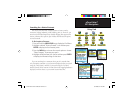
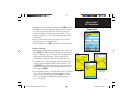
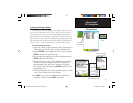
5. Highlight the “Record Method” fi eld and press ENTER to display
the Distance, Time and Auto options. Because a track is made
of a series of points that defi ne your path of travel, they can
be placed a specifi ed “Distance” apart or placed at a “Time”
interval you specify. The “Auto” option allows you choose from
fi ve intervals.
6. Next, set the interval for setting track points. You can choose
from distance, time or frequency values.
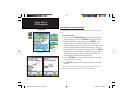
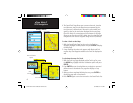
7.
W
hen completed, press the QUIT key to return to the Track Log
Page.
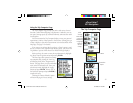
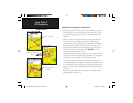
T
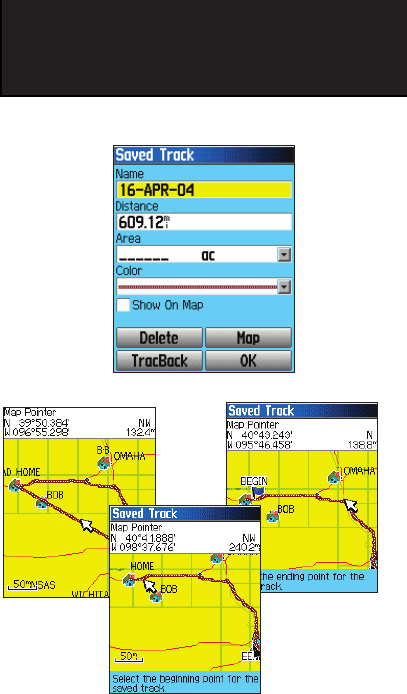
o save a Track Log:
1.
With the Tracks Page displayed, highlight the “Save” button and
press ENTER. You will be asked “Do You Want To Save the Entire
Track?”. If you select “Yes,” a “Saving Track” message appears
followed by the Saved Track Page. The new saved track is a
representation of the entire track log from beginning to end.
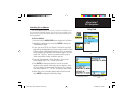
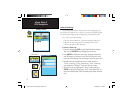
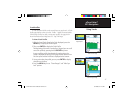
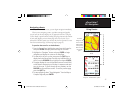
2. If you select “No,” a map showing the entire track appears and
prompts “Select the beginning point for the saved track.” Use
the ROCKER key to move the Panning Arrow to the point on the
track line that you want to become the beginning of the Saved
Track and press ENTER.
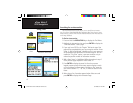
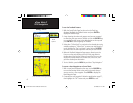
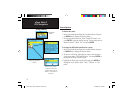
3. The next prompt asks you, “Select the ending point for the saved
track.” Use the Panning Arrow to identify a point on the track
that you want as the End Point and press ENTER. A “Saving
Track” message appears followed by the Saved Track Page.
(cont. on following page)
Saved Track Page
Saved Track
on Map
Select Track Beginning Point
Select Track
Ending Point
eTrex Vista C Owner's Manual Text.indd 45 8/12/2004, 9:17:12 AM