


48
eTrex Vista C
T
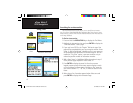
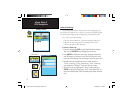
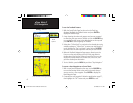
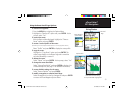
o use the TracBack feature:
1.
With the Saved Tracks Page for the track or the Track Log
displayed, highlight the TracBack button and press ENTER to
display the TracBack Page.
2. A map showing the entire track appears and you are prompted
to select the point you want to TracBack to. Use the ROCKER key
to move the Panning Arrow to the desired point on the map and
press ENTER to start navigating the TracBack.
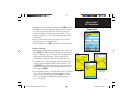
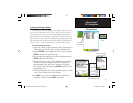
3.
Select either “Follow Road” to route back to the selected point using
available roadways or “Follow Track” to retrace your original path of
travel. Highlight the “Don’t ask Again” option and press ENTER if
you want to use the same option the next time you use TracBack.
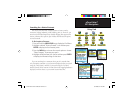
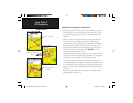
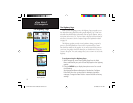
4. When the TracBack Navigation Page appears, directions to the
fi rst turn on the track display at the top of the page. Move in
the direction of the fi rst turn. When you reach the fi rst turn, the
display will provide direction to the next turn, and so on, until
you have reached your destination.
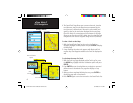
5.
To exit a TracBack, press the MENU key and select “Stop Navigation.”
T
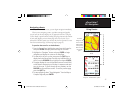
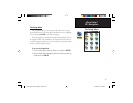
o create a User Waypoint on a Saved Track:
1.
With a saved track displayed on the map, use the ROCKER key
to move the Panning Arrow to the point on the track that you
want to mark as a user waypoint. Press ENTER to display the
Mark Waypoint Page.
2. Customize the user waypoint if desired as explained on page 27,
then highlight the “OK” button and press ENTER to save.
TracBack Page
Active Tracback Following the Track
GPS Navigation
Using Tracks
TracBack
Route
Options
eTrex Vista C Owner's Manual Text.indd 48 8/12/2004, 9:17:17 AM