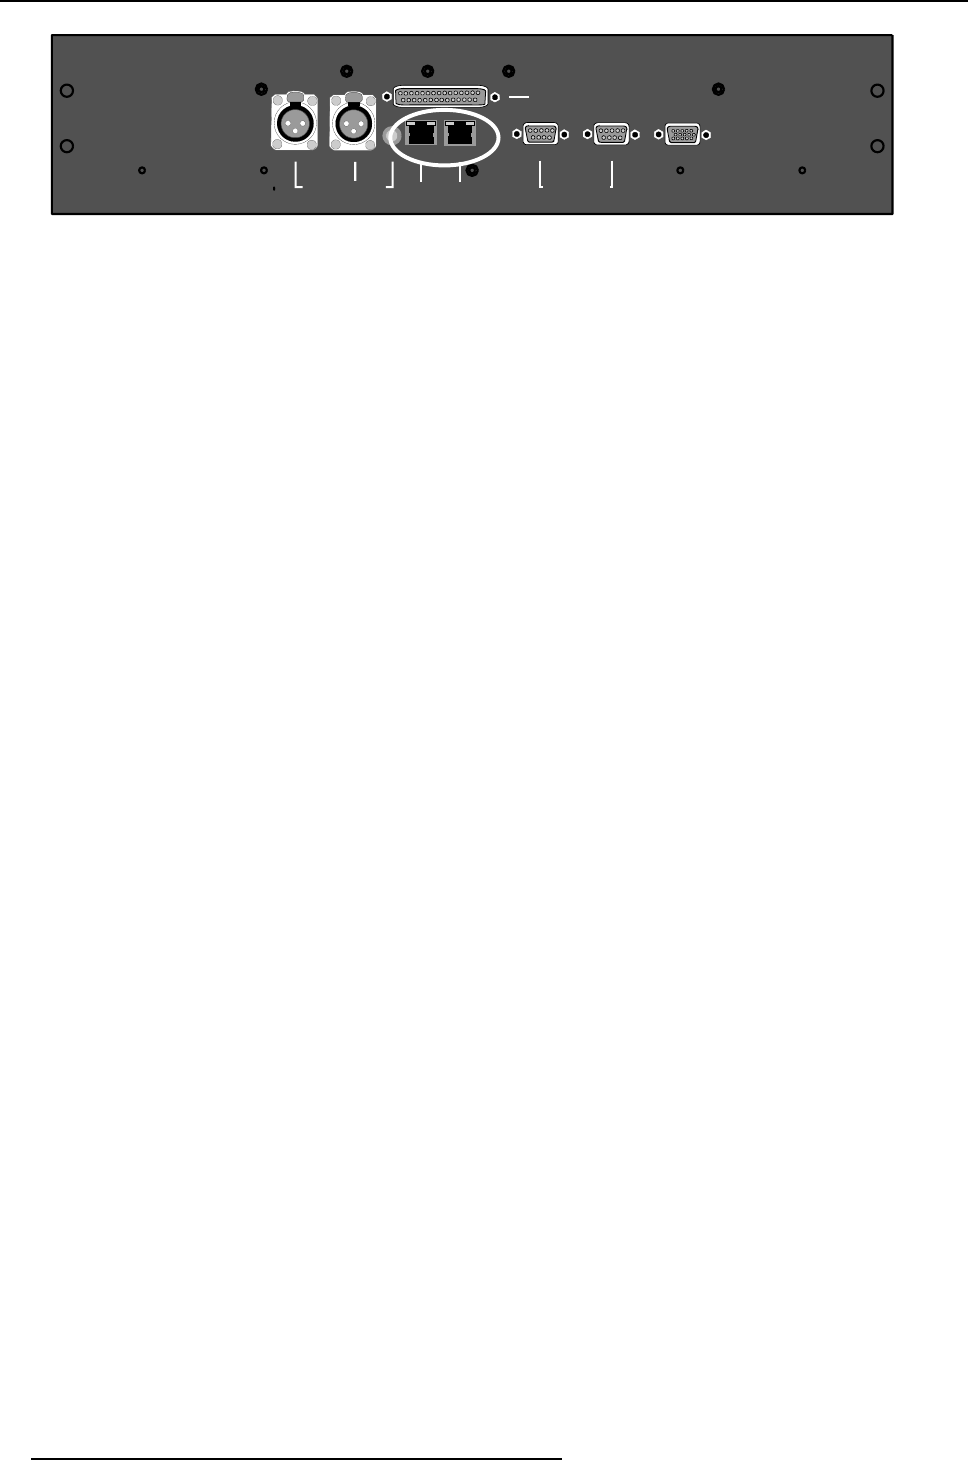
3. Projector Connection
MONITOR OUT
2
1
3
PUSH
2 1
3
PUSH
HARDWIRED REMOTE 10/100 BASE T
SERIAL NETWORK
MONITOR OUT
RS232/422 OUT
RS232/422 IN
WIRELESS REMOTE
CTRL 3
CTRL 2 CTRL 1 PORT 1
PORT 2
BI-DIRECT IONAL UNI-DIRECT IONAL
Image 3-1
Ethernet connection
The projector must have an IP address and the IP address of the connected PC must be within the same
range of IP addresses.
3.2.3 Add new projector
Whatcanbedone?
Up to 8 projectors can be added to the list. Once added, this projector can be controlled with the Com
-
municator.
How to add ?
1. Right click in the projector list pane.
A pop-up window appears (image 3-2)
2. Select Add projector.
The projector settings window opens. (image 3-3)
3. Click in the Projector Name input field and fill out a name for the projector.
Note: The projector name should be unique.
4. Click in the left IP Ad dres s input field and enter the IP address of the projector.
Note: An address contains 4 octets with a maximum value of 255.
5. Click on the Port Number drop down box and select the port.
Note: The combination IP address and port number must be unique.
Default 43680.
It is possible to enter the same IP address with a different port number. That means that the same
projector can be accessed by 2 different Communicator via a different port.
6. If you want to add a short cut for this projector, click on the drop down box and select the desired short
cut.
Note: The short cut must be unique for each projector.
Short cuts for F1 to F8 can be associated with the projector. When a short cut is associated to a pro-
jector, this projector can be selected (as read/write) from any pane in the software.
7. Click OK to add the projector.
8
R5976790 COMMUNICATOR 09/07/2004


