


36
Navigate Trail
will not be able to take advantage of the automatic trail creation
feature in Easy Mode.
Displaying a Saved Trail
The trail is automatically displayed in Easy Mode by default. Trail dis-
play can be selectively turned off and on only in Advanced Mode.
Navigating or Backtracking a Trail
There are two methods for following your back trail. The simplest re-
quires no menu commands at all, but provides no navigation informa-
tion during the trip. The other requires only three keystrokes and pro-
vides a full range of navigation data. Try both methods and see which
you prefer. When hiking at walking speed, we often just use visual back
trailing because it is better at following each little turn on a footpath.
At faster speeds, like on a highway or water, the Navigate Trail com-
mand is handy.
Visual Back Trailing
1. On the Map Page, zoom (
ZIN or ZOUT) so your trail is visible.
2. Begin moving and watch the Map. Walk or steer so your current po-
sition arrow follows the trail you just made.
Navigate a Back Trail
1. Press
MENU|↓ to NAVIGATE TRAIL|ENT.
2. Now, begin moving and follow your iFINDER.
NOTE:
If you are already located at or near the
beginning of your back trail, the arrival alarm
will go off as soon as you hit Enter. Just press
EXIT to clear the alarm and proceed.
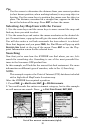
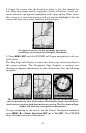
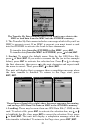
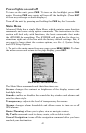
On the map, your original trail is visible as a solid
line, along with a roughly parallel dotted line
indicating the back trail to follow. The map contains a steer arrow in
the lower right corner. This arrow shows you where to steer to reach
the next waypoint on your back trail.
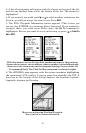
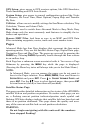
The Navigation Page will also show the trail line and a bearing arrow,
which points to the next waypoint on the trail.
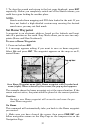
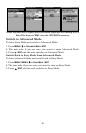
As you travel, the arrival alarm will go off when you near a waypoint,
and the steer arrow (on the map) and bearing arrow (on the compass
rose) will swing around and point to the next waypoint on the trail.
Press
EXIT to clear the alarm.