


Garmin G1000 Cockpit Reference Guide for the Mooney M20M & M20R
4-3
SECTION 4 – NAV/COM &
TRANSPONDER
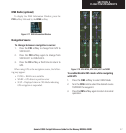
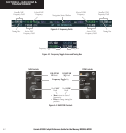
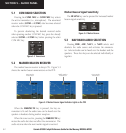
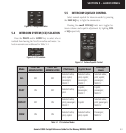
4.1 RADIO STATUS INDICATIONS
• TX – When a COM radio is keyed, a white TX
indication appears to the right of the corresponding
COM frequency.
• ID – When the Morse code identifier is ON for a
NAV radio, a white
ID indication appears to the left
of the corresponding active NAV frequency. The
Morse code identifier can be heard if the correspond-
ing NAV radio is selected on the audio panel.
Figure 4-5 Radio Status Indications
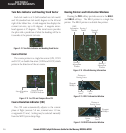
4.2 VOLUME
‘VOLUME’ is displayed in place of the associated radio
name (i.e., ‘COM1’ or ‘NAV2’) for two seconds after the
volume level is last changed.
Figure 4-6 COM Volume Level
4.3 AUTOMATIC SQUELCH
Automatic squelch can be disabled for a COM radio by
pressing the COM knob to select the desired COM sub-
window, then by pressing the VOL/PUSH SQ knob.
4.4 QUICKLY ACTIVATING 121.500 MHZ
Pressing and holding the COM Frequency Toggle key
for approximately two (2) seconds automatically tunes the
selected COM radio to the emergency frequency.
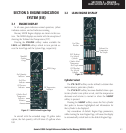
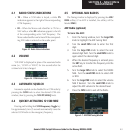
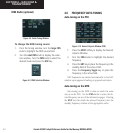
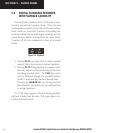
4.5 OPTIONAL NAV RADIOS
The Tuning window is displayed by pressing the ADF/
DME softkey (if no ADF is installed, the softkey will be
labeled DME).
ADF Radio (optional)
To tune the ADF:
1. From the Tuning window, turn the
large FMS
knob to highlight the ADF tuning field.
2. Turn the
small FMS
knob to enter the first
digit.
3. Turn the
large
FMS
knob to select the next
desired digit field. Turn the
small FMS
knob to
again select the desired digit.
4. When the desired frequency is entered press
the
ENT
key to transfer the frequency into the
active field.
5. Turn the
large FMS
knob to select the MODE
field. Turn the
small FMS
knob to select ADF
or BFO.
6. Turn the
large FMS
knob to select the volume
field if desired. Turn the
small FMS
knob to
adjust the ADF volume to the desired level.
7. Press the
FMS
knob to exit all the fields.
Figure 4-7 ADF/DME Tuning Window