


Quest Owner’s Manual 5
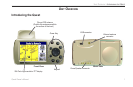
UNIT OVERVIEW > VEHICLE INSTALLATION
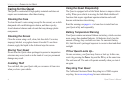
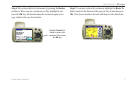
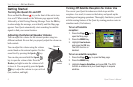
Removing the Quest and the Mount
To remove the Quest from the mount, gently pull the release tab on
the top of the mount up and remove the Quest.
The cradle and suction mount snap apart and back together. To
remove the mount from the cradle, turn the cradle as far as you can
to the right or left. Apply pressure in that direction until the mount
pops out of the ball socket.
To remove the mount from the windshield, flip the lever toward
you. Pull the rubber tab on the suction cup toward you.
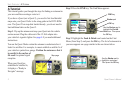
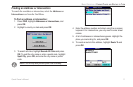
Using the Mounting Disk
Use the enclosed mounting disk as an alternative to using the
suction cup mount on your windshield. Select a suitable location on
your dashboard to place the mounting disk. Select a location where
the unit has an unobstructed view of the sky and does not interfere
with the driver’s view of the road or obstruct any controls in the
vehicle.
WARNING: The mounting disk affixes to your dashboard with
permanent adhesive that is extremely difficult to remove after it is
installed.
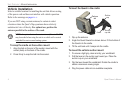
1. Clean and dry the area on your dashboard where you want
to place the mounting disk.
2. Remove the backing from the permanent mounting
adhesive on the bottom of the disk and place the disk on the
dashboard. Press firmly for several seconds.
3. Pull the lever on the suction cup up (away from the disk).
Place the suction cup mount on top of the disk.
4. Flip the lever down (toward the disk) to secure the suction
cup mount to the disk.