


50
FC-21 Flow Computer
Sub-menus Display Notes
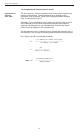
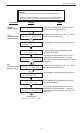
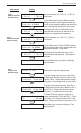
8.2.12
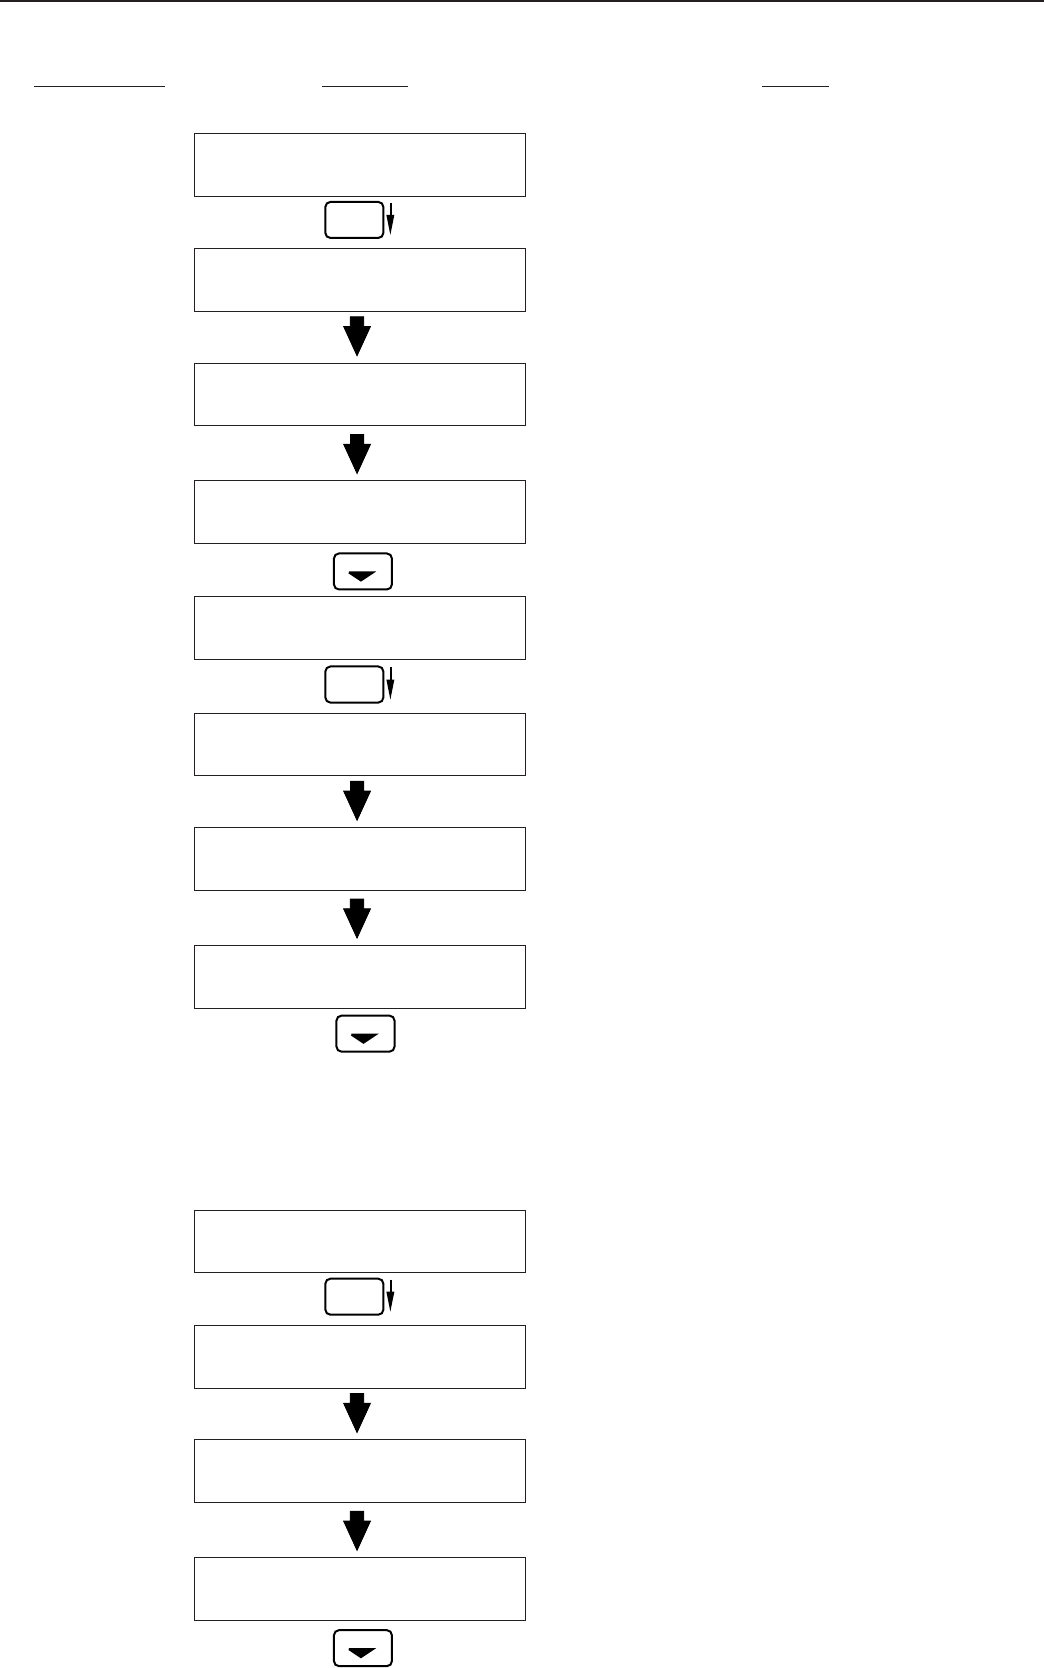
Calibrate CH2 0V
Submenu Group
Calibrate ch2 0V
Vin=TB1-5 GND=TB1-4
Calibrate ch2 0V
0 CALIBRATING ——
Calibrate ch2 0V
*** DONE ***
Calibrate ch2 0V
Iin=TB1-5 GND=TB1-4
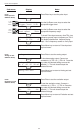
Calibrate ch2 10V
Iin=TB1-5 GND=TB1-4
Calibrate ch2 10V
0 CALIBRATING ——
Calibrate ch2 10V
*** DONE ***
Calibrate ch2 10V
Iin=TB1-5 GND=TB1-4
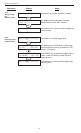
Advance to
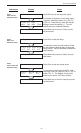
Calibrate 100ohm RTD
Calibrate 100ohm RTD
JMP TB1-6,7 100R=7,8
Calibrate 100ohm RTD
0 CALIBRATING ——
Calibrate 100ohm RTD
*** DONE ***
Calibrate 100ohm RTD
JMP TB1-6,7 100R=7,8
Advance to
Calibrate 4mA out
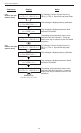
8.2.13
Calibrate CH2 10V
Submenu Group
To Calibrate: Connect Voltage Source (+)
TB1-5, (-) TB1-4. Input 0V and press Enter.
This message is displayed during calibration.
This message is displayed when the 0V
calibration is finished.
The display will automatically return to the
Calibrate CH2 0V top-level menu. Press the
Down arrow key to advance to the CH2 10V
calibration.
To Calibrate: Connect Voltage Source (+)
TB1-5, (-) TB1-4. Input 10V and press Enter.
This message is displayed during calibration.
This message is displayed when the 10V
calibration is finished.
The display will automatically return to the
Calibrate CH2 10V top-level menu. Press the
Down arrow key to advance to the 100 ohm
RTD calibration.
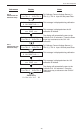
To Calibrate: Connect a jumper wire between
TB1-6 and TB1-7, Place a 100 ohm 0.1%
resistor between TB1-7 and TB1-8. Press
enter to calibrate.
This message is displayed during calibration.
This message is displayed when the RTD
calibration is finished.
The display will automatically return to the
Calibrate 100 ohm RTD top-level menu.
Press the Down arrow key to advance to the
4mA out calibration.
ENTER
STOP
ENTER
STOP
8.2.14
Calibrate 100 ohm
RTD
Submenu Group
ENTER
STOP