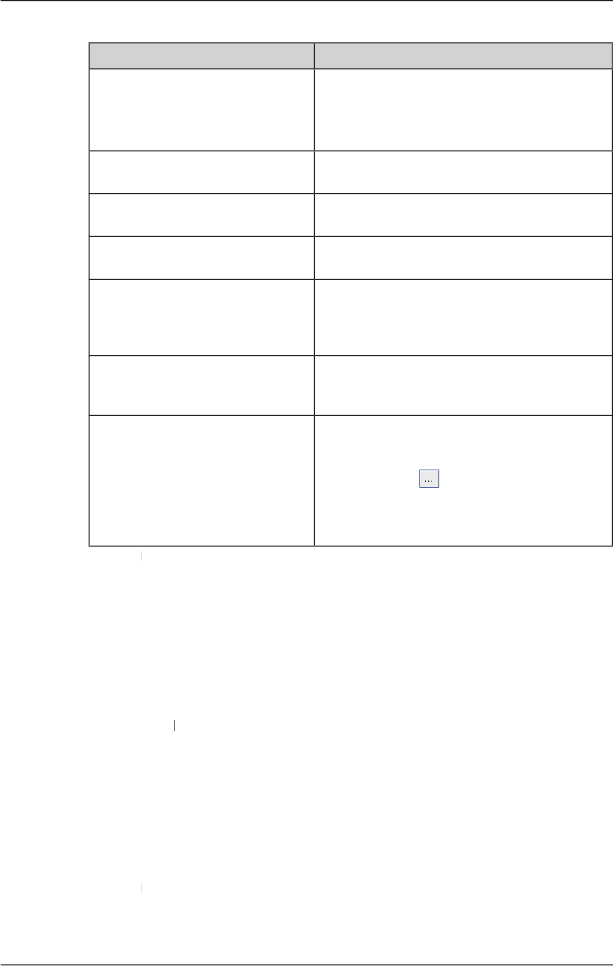
3. Modify the POI settings as required:
Note: If you do not activate the POI, you will be
able to configure only the
enable a visual warning when the
POI is in close proximity
enable a warning chime when the
POI is in close proximity
change the units used to measure
select the distance from the POI
at which the visual warning should
display or the warning chime
select the distance from the
indicate the priority of this POI
when one or more additional POIs
select a custom POI type icon to
display on the map (if you do not
select a custom icon, a default icon
Type the path to the icon fi le to be used to
represent the POI type in the
select the icon fi le from your local or network
. The fi le must be a bitmap (.bmp)
graphic with a minimum of 6x6 pixels and a
OK and follow the prompts. OK
The POI fi le is saved to the iCN as a Custom POI type.
• If you want to change the fi le name, edit the fi le name in the
The fi le name can be up to eight characters and cannot contain spaces.
Deleting a Custom POI File from your iCN
POI Editor window will open.POI Editor
window will open, displaying a list of custom POI fi les installed on
of the POI fi le to delete.
The fi le is removed from the list, but is not yet deleted.
5. To select another fi le to delete, go back to step 2; otherwise, proceed to step 6.
OK and accept the changes. OK
The selected fi le or fi les are deleted.


