43
Display modes are different only in the number of events displayed in the list. List
items are always shown with all information available including pictograms of the
needed action and distance of the event from the previous list item.
The Itinerary is live and constantly updated when navigating a route. The list item
coming next in navigation is the highlighted one until you highlight another one by
tapping. After that, the highlight remains on the item you have selected.
• Detailed Instructions: this is the list displayed when Itinerary is opened. It is the
list of events in full detail. All significant junctions are shown in the list, even ones
to be passed.
• Instructions: by tapping the Mode button once you will see the list of events that
need your attention, i.e. the list of maneuvers during the route. These are the
events shown in the Turn preview field and announced by the voice instructions.
• Route summary: tapping the Mode button again will show an overview of the
route that contains only the significant roads and intersections.
Show
Tap this button to see the highlighted list item on the map. This will help you identify
route events in the list.
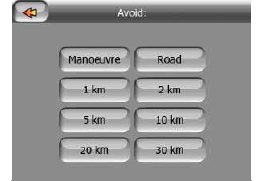
Avoid
Tap this button to show a list of possibilities for modifying the route. They let you
recalculate the route avoiding the highlighted event and sometimes also some of the
subsequent ones.
• Maneuver: this option avoids the highlighted action. For example if you find a turn
too difficult during rush hour traffic, MioMap will recalculate the route excluding
that turn. If the next street is important in the route, it is likely that MioMap will
replace the turn with several easier ones to get to the same street.
• Road: when you exclude a road, MioMap will calculate a route that does not use
that road. It is useful when you anticipate a traffic jam in a street used in your
route, or a roadblock is announced on the radio, and you find that road in your
Itinerary.
• Distances: you can also find some distance buttons in this list. They are similar to
the ones in the Bypass list of the Recalculate menu (Page 41), but these can also
be used for distant parts of the route.


