


5.3Chapter 5 Performing Common Tasks
Purging Records
Over time, as you use Date Book and the To Do List, you may accumulate records that are no longer useful. For example, events
that occurred months ago remain in the Date Book, and completed To Do List items remain in the list.
Outdated records take up memory on your handheld, so it’s a good idea to remove them by using Purge. If you think Date Book
or To Do List records might prove useful later, you can purge them from your handheld and save them in an archive file.
Purging is not available in Address Book or Memo Pad, so records from these applications must be deleted manually.
To purge a record:
1. Open the application from which you want to purge records.
2. Choose from the following options:
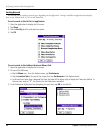
• Tap the Menu icon, open the Record menu, and then tap Purge. A confirmation dialog box appears.
• Tap the inverted tab at the top of the screen, open the Record menu, and select
Purge
.
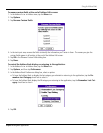
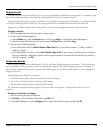
3. Choose from the following options:
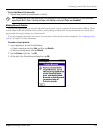
• For the Date Book, select the Delete Events Older Than pick list and select an option—1 week, 2 weeks, 3
weeks or 1 month.
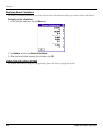
• For the Date Book or To Do list, select Save Archive Copy on PC
to save a copy of purged records in an archive
file on your desktop. Selecting this option transfers purged records to an archive file the next time you perform a
HotSync
®
operation. Tap OK.
Categorizing Records
You can categorize records in the Address Book, To Do List and Memo Pad applications for easy retrieval. (The Date Book does
not have categories.) When you create a record, it is automatically assigned to the currently displayed category. For example, if
the All category is displayed, the record is assigned to the Unfiled category. A record can remain unfiled or it can be assigned to a
category at any time.
Each application has a default set of categories:
• The Address Book includes a Business, Personal, and QuickList category.
• The To Do List includes a Business, Personal, and All category.
• The Memo Pad includes a Business, Personal, and All category.
You can rename or delete the default categories, and you can create new categories. Each application can have up to 15
categories.
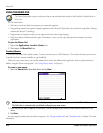
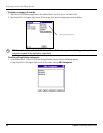
To move a record into a category:
1. Select the record you want to categorize.
2. Tap
Details. (From the Address View screen, tap Edit first.)
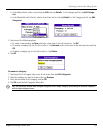
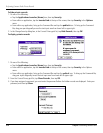
3. In the Details dialog box, tap the
Category pick list, select the desired category, and then tap OK.
Performing Common Tasks: Editing Records