


©2011 Edelbrock LLC
Part #1596, 1597, 1598 & 1599
Brochure #63-1598
Rev. 2/11 - AJ/mc
Edelbrock E-Force Supercharger System for
the 2010 Camaro SS
Installation Instructions
Page 21
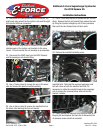
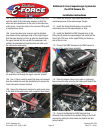
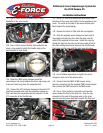
156. Reconnect the fog light electrical connectors and the
fascia wiring harness connector on the passenger side.
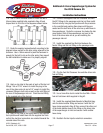
157. Use a 10mm socket to reconnect the positive
battery terminal.
158. Use a 10mm socket to reconnect the negative
battery terminal.
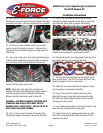
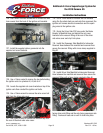
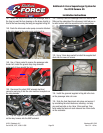
159. Remove intercooler reservoir cap and fill intercooler
system with a 50/50 blend of water and coolant.
160. Refill the engine coolant system with a 50/50 blend
of water and coolant.
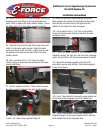
161. Reinstall and secure the front inner fender wells
with the stock fasteners.
162. Reinstall the front wheels and snug the lug nuts.
Lower the vehicle to the ground then torque the lug nuts
in a crossing pattern to 100 ft/lbs.
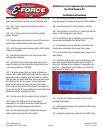
163. It is recommended that you check the Edelbrock
website (http://www.edelbrock.com/automotive_new/mc/
superchargers/fuel_injected_soft-tech.shtml) to confirm
that you have the latest calibration. Once you have found
the latest tune on the site, power on the programmer,
press the left arrow and select the Device Info option.
Scroll down to Tune Version and compare that number to
the one on the site. If they are different, download the new
calibration with the supplied USB cable.
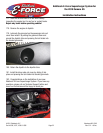
164. Turn the key to the On position, but do not start it.
165. Connect the PCM cable from the supplied
downloader to the OBD-II connector located below the
steering wheel in the passenger compartment.
166. Use the directional pad to highlight the Program
Vehicle option and press the Select button.
167. Use the directional pad to highlight the
Preprogrammed Tune option and press the Select button.
168. Read disclaimer then press Select to continue.
169. Verify ignition is in the ‘Key On’ position but that the
engine is not running then press Select.
170. Use directional pad to highlight your vehicle and
transmission combination then press Select.
171. Use directional pad to highlight your vehicle and
transmission combination then press Select, again.
172. Use directional pad to highlight Begin Program then
press Select.
173. Vehicles equipped with a manual transmission will
have three separate operations take place during this
step, while vehicles with an automatic transmission will
have five. Completion of each operation will cause the
progress bar to reset to zero.
DO NOT unplug the programmer until prompted.
174. Turn the car off when prompted to do so by the
handheld programmer.
175. Read parting message from programmer then press
Select to continue.
176. Unplug the programmer cable from the OBD-II port.