


©2011 Edelbrock LLC
Part #1596, 1597, 1598 & 1599
Brochure #63-1598
Rev. 2/11 - AJ/mc
Edelbrock E-Force Supercharger System for
the 2010 Camaro SS
Installation Instructions
Page 18
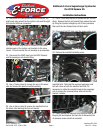
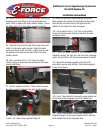
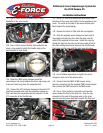
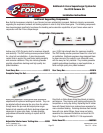
126. Use a small flat blade screwdriver to remove the wire
loom covers from the back of the ignition coil brackets.
127. Install the supplied rubber grommets into the
supplied coil cover brackets.
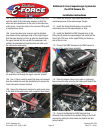
128. Use a 10mm socket to remove the two bolts holding
the ignition coils for cylinders #2, #3, #6 & #7.
129. Locate the supplied coil cover brackets on top of the
ignition coils then reinstall the ignition coil bolts.
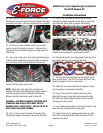
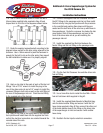
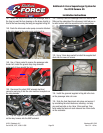
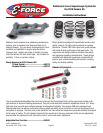
130. Use a 10mm wrench to remove the valve cover ball
stud from the driver side cover.
131. Use a pair of pliers to remove the vacuum cap from
the rear of the driver side valve cover.
132. Use a 10mm socket to reinstall the coil brackets
using the five stock studs on each side then reconnect the
ignition coil harness electrical connectors and the spark
plug wires to the ignition coils.
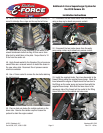
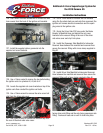
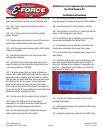
133. Route the Driver Side PCV hose under the Brake
Booster to Manifold Hose and behind the coil cover
brackets to the vacuum fitting at the rear of the driver
side valve cover and clip it into place.
134. Install the Passenger Side Manifold to Intercooler
Reservoir Hose between the manifold and reservoir then
secure the reservoir fitting with a hose clamp supplied in
Bag #2.
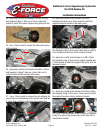
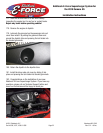
135. Install Driver Side Manifold to Intercooler Reservoir
Hose between the manifold and reservoir then secure the
reservoir fitting with a hose clamp supplied in Bag #2.
136. Connect the Intercooler Hose Assembly to the rear
facing driver side fitting and the side facing passenger side
fitting. Push each hose end on until it clicks into place.