


©2011 Edelbrock LLC
Part #1596, 1597, 1598 & 1599
Brochure #63-1598
Rev. 2/11 - AJ/mc
Edelbrock E-Force Supercharger System for
the 2010 Camaro SS
Installation Instructions
Page 20
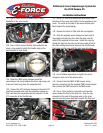
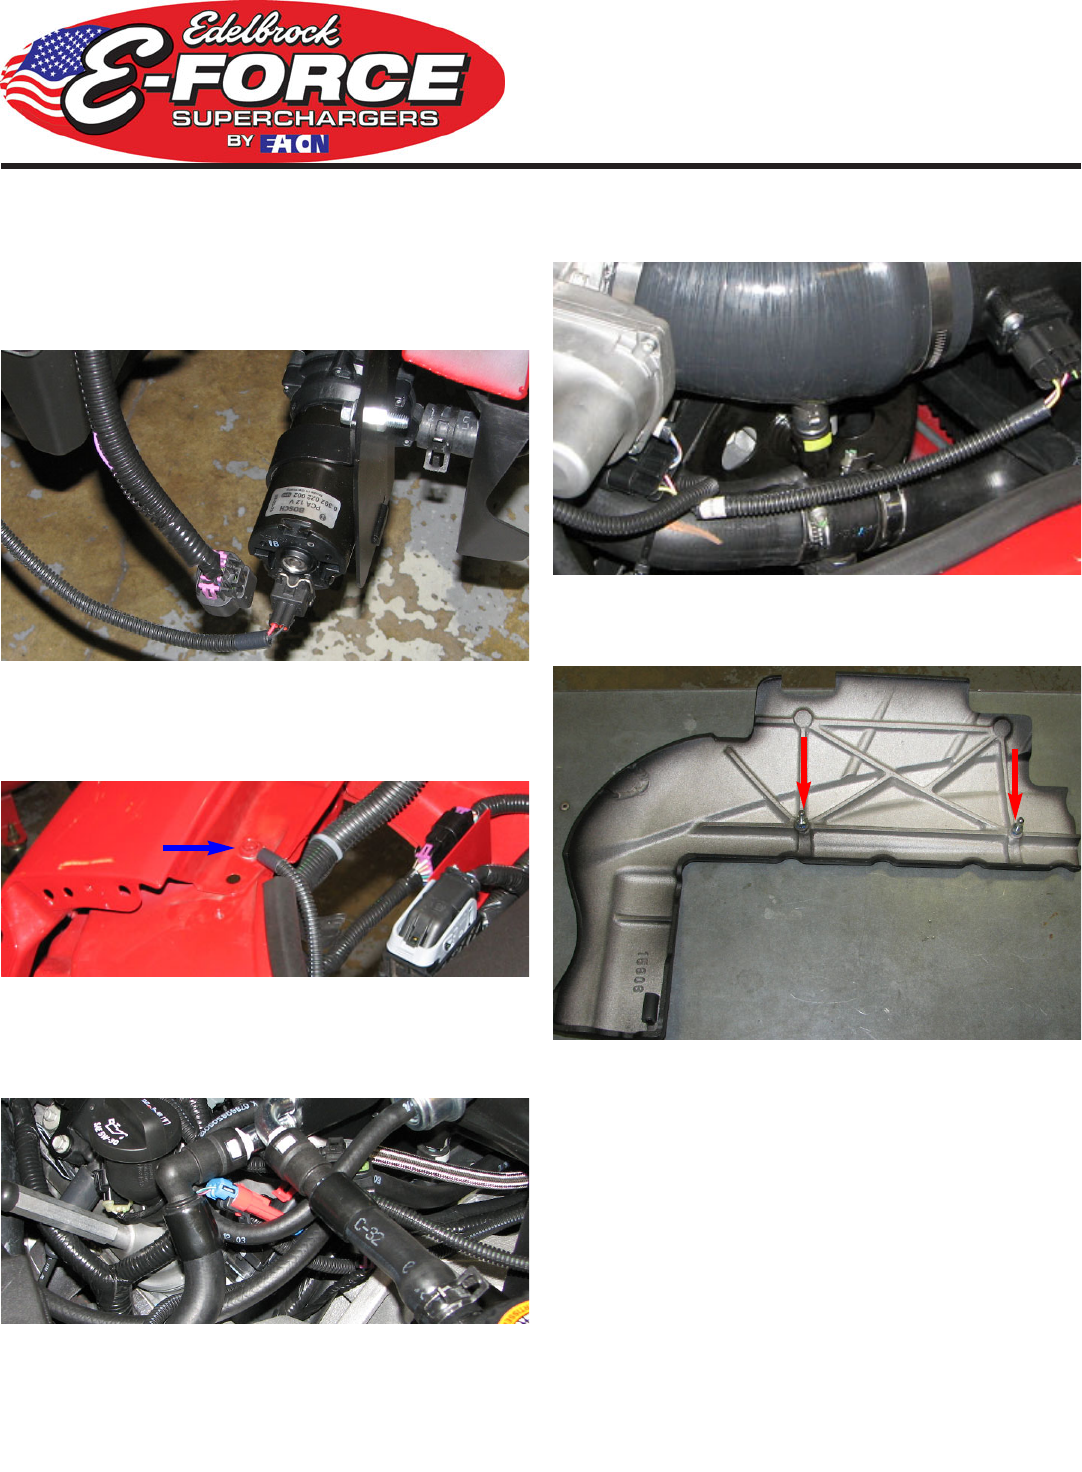
147. Install the relay on the tab on the passenger side of
the fuse box and the fuse housing on the brace directly in
front of the fuse box using the body pins supplied in Bag #2.
148. Route the intercooler water pump connector attached
to the relay down to the water pump and plug it in.
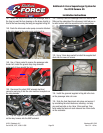
149. Use a 10mm socket to remove the passenger side
fender bolt, install the ground strap ring connector
underneath it then reinstall the bolt.
150. Disconnect the stock EVAP solenoid electrical
connector and plug it into the color matched receptacle on
the relay harness.
151. Clip the supplied EVAP solenoid electrical connector
on the relay harness into the EVAP solenoid.
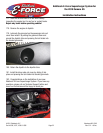
152. Carefully route the Passenger Side PCV Hose to the
fitting on the underside of the silicone air inlet tube so as
to avoid contact with the serpentine belt or any pulleys.
153. Use a 10mm deep socket to install the supplied ball
studs into the new coil covers.
154. Install the grommet supplied in Bag #6 in the hole
on the passenger side coil cover.
155. Slide the front fascia back into place and secure it
by reinstalling the stock fasteners, including: six body
pins and two bolts on top, three 10mm and two 7mm
bolts inside the fascia on each side and two 10mm bolts
on the underside.