


©2011 Edelbrock LLC
Part #1596, 1597, 1598 & 1599
Brochure #63-1598
Rev. 2/11 - AJ/mc
Edelbrock E-Force Supercharger System for
the 2010 Camaro SS
Installation Instructions
Page 19
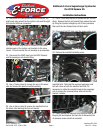
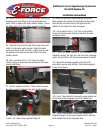
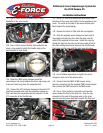
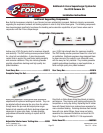
137. Use a 16mm wrench to install the coil cover
standoffs on the valve covers.
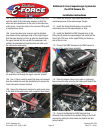
138. Use a 10mm socket, the four stock bolts and the
stock o-ring gasket to install the throttle body on the
supercharger air inlet flange.
139. Route the TMAP wiring harness below the
supercharger hub snout towards the driver side using care
to secure it well away from the serpentine belt.
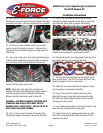
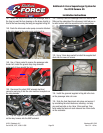
140. Connect the ETC extension harness to the stock ETC
electrical connector and route the extension harness so
that it will clear the serpentine belt and connect it to the
ETC connector on the throttle body.
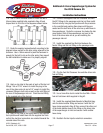
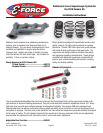
141. Use a T20 Torx bit to remove the MAF sensor from
the stock air box cover and install it in the supplied air box
cover. The arrow on the side of the sensor should point
back towards the supercharger.
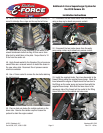
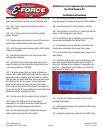
142. Replace the stock air filter with the one supplied.
143. Slide the supplied worm clamps over each end of
the supplied silicone tube then slide the tube onto the
outlet of the supplied air box cover. Install the cover by
sliding the tabs into the holes on the driver side of the air
box while sliding the silicone tube onto the throttle body.
Push down on the cover until the tabs snap into place.
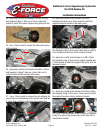
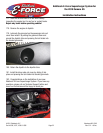
144. Use a flathead screwdriver to tighten the worm
clamps on each end of the silicone tube.
145. Connect the stock MAP & MAF sensor wiring
harness connectors into the supplied TMAP wiring harness
then connect the TMAP harness to the MAF sensor.
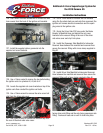
146. Use a 13mm socket to remove the nut from the
power stud at the front of the fuse box. Slide the ring
connector at the end of the orange wire on the relay
harness over the power stud then reinstall the stock nut.