ENGINE AND PERIPHERALS
Overhauling the engine
10
10-89
CHECKING PISTON PROTRUSION
Clean the piston heads.
Turn the crankshaft once clockwise at the timing end
to bring piston n˚ 1 near to top dead centre.
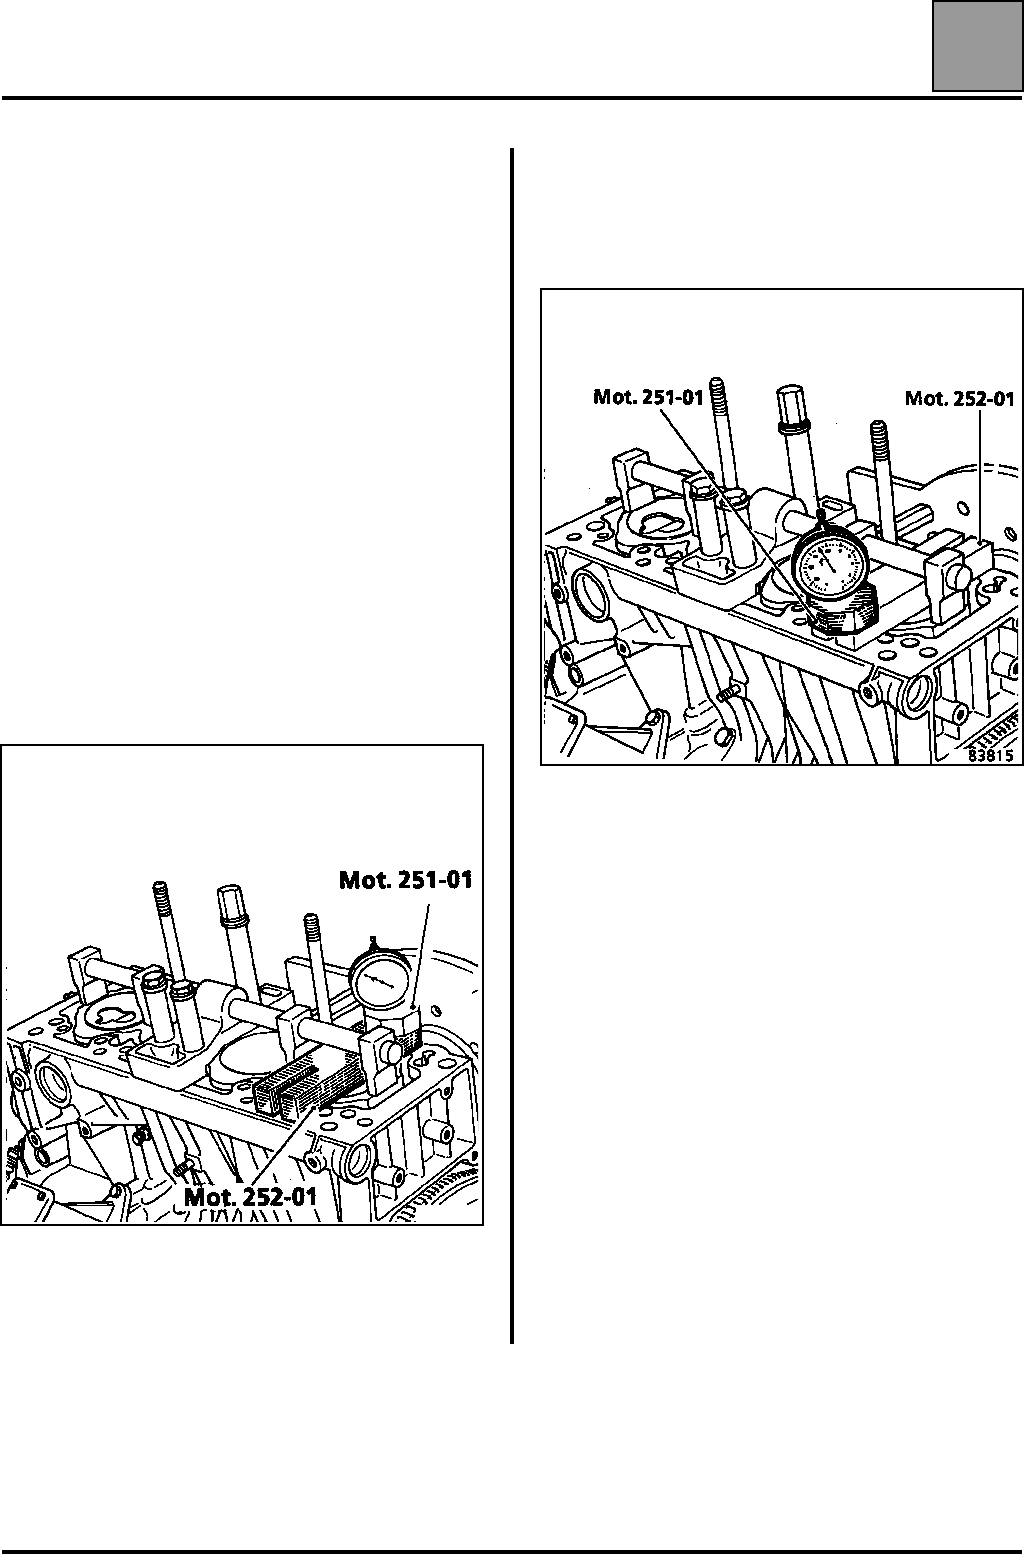
Place tool Mot. 252-01 on the piston.
Place tool Mot. 251-01 fitted with a gauge on the thrust
plate Mot. 252-01, the dial gauge measuring pin being
in contact with the cylinder block, and look for the TDC
of the piston (turn the crankshaft clockwise at the
timing end).
Without putting pressure on the tools or the piston,
to avoid tilting of the piston during measurement,
measure the protrusion when the piston is in position
1, then in position 2 and calculate the average of the
two measurements.
Example:
Protrusion in position 1: 0.83 mm.
Position 1
Example:
Protrusion in position 2: 1.09 mm.
Position 2
Calculate the average piston protrusion:
(083 + 1.09): 2 = 0.96 mm
Carry out this procedure for the other pistons (look for
the TDC by turning the crankshaft clockwise at the
timing end, do not put pressure on tools Mot. 251-01,
and Mot. 252-01 or on the piston).
ONLY CONSIDER THE DIMENSIONS OF THE
PISTON WITH THE GREATEST PROTRUSION
For a protrusion:
– less than 0.96 mm use a cylinder head gasket
1.6 mm thick, marked with 1.6 or 1 hole,
– between 0.96 and 1.04 mm, use a cylinder head
gasket 1.7 mm thick, without a stamped mark or
a hole,
– more than 1.04 mm use a cylinder head gasket
1.8 mm thick, marked with 1.8 or 2 holes.
83814R
83815R


