ENGINE AND PERIPHERALS
Overhauling the engine
10
10-99
Checking the piston-cylinder head clearances
Checking the piston-valve clearances
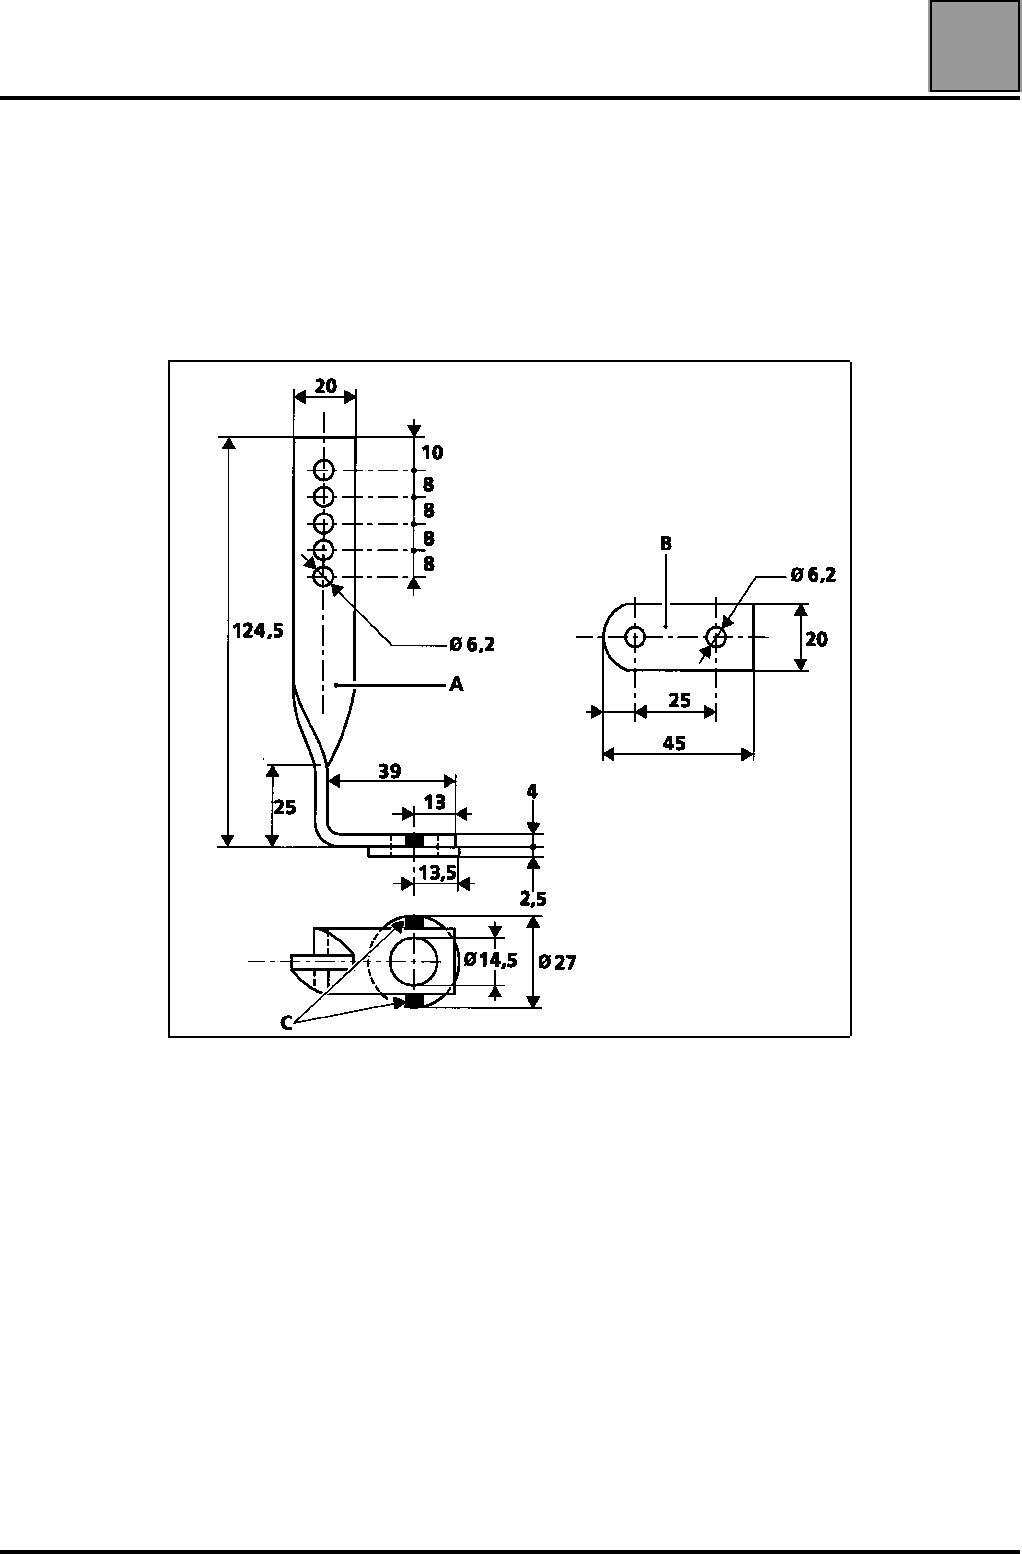
Using a locally manufactured tool (formerly tool Rou. 541) fixed to a camshaft
bearing mounting, place the dial gauge on the stem of the valve retained for
measuring the valve clearance dimensions.
A foot dimension: 20 x 4 x 163.5
B arm dimension: 20 x 4 x 50
C two spot weld points
The piston must be near to top dead centre.
Check this by putting pressure on the valve stem.
Remove the keys and the valve spring (use tool Mot. 382).
Using the dial gauge and keeping the valve pressed down on the piston,
bring the piston to top dead centre.
Set the dial gauge to zero, and then pull on the valve stem until it touches the
seat. The resulting measurement corresponds to the piston - valve distance.


