


160 GPSMAP 496 Owner’s Manual
Appendix > Installation Information
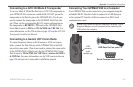
To connect your GPS to your computer:
1. Connect the small end of your cable to the lower connector on
the back of the GPSMAP 496.
2. When using the supplied USB Data Cable, connect the larger
end of the cable to an available USB data port.
When using a PC Interface Cable, connect the larger end of the
cable to a serial communications port on your computer.
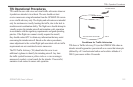
Information about USB Drivers
The USB drivers should have been automatically installed when you
installed the MapSource program that came with your GPSMAP
496. When you initially connect the GPSMAP 496 to a USB port,
your computer prompts you to locate the destination of the drivers
for the device. You only need to install the drivers once. After the
drivers are installed, your computer always detects your GPSMAP
496 when it is connected. USB drivers are updated periodically. You
can nd these updates at www.garmin.com.
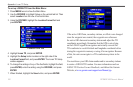
Using xImage for Customized Waypoint Symbols
xImage allows you to exchange images between your PC and your
GPSMAP 496. You can download and save screen shots of any
screen shown on your unit. xImage also allows you to download
customizable splash screens and waypoint symbols from compatible
GPS units, customize them (if you have an image editing program
on your PC), and send them back to your GPS unit.
You can download xImage from the Garmin Web site at
www.garmin.com/ximage. Refer to the help le for complete
instructions about using xImage.
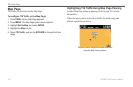
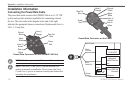
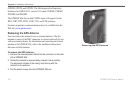
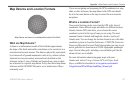
Installing and Removing Data Cards
The GPSMAP 496 uses an optional Garmin data card to show
digital charts and maps. Install the data card in the slot located on
the bottom of the unit. Install or remove the data card at any time,
whether the unit is on or off.
You can load a variety of information on your data card, such as
BlueChart and MapSource detailed maps in a MapSource program.
You can buy pre-programmed cards to use with your GPSMAP 496.
Data cards are not waterproof, should not be exposed to moisture or
excessive static charges, and should be stored in the case supplied
with the card.
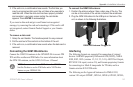
To install a data card:
1. Insert the card into the slot on the bottom of the unit. Be sure the
label is facing the front of the unit.
2. Firmly push the card into the unit. It is not necessary to force the
card. The handle is still exposed when it is properly inserted.