


35
Reference
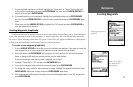
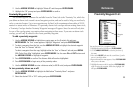
Proximity Waypoint List
2. Use the ARROW KEYPAD to highlight ‘Delete All’ and then press ENTER/MARK.
3. Highlight the ‘OK’ prompt and press ENTER/MARK to confirm.
Proximity Waypoint List
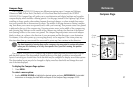
The second waypoint submenu list available from the ‘Points’ tab is the ‘Proximity’ list, which lets
you define an alarm circle around a stored waypoint position, and can be used to help you avoid reefs,
rocks or restricted waters. Up to ten waypoints may be listed, with a maximum alarm radius of 99.99
nautical or statute miles or kilometers. If a proximity alarm circle overlaps with an existing alarm circle,
a ‘Proximity Overlaps Another Proximity Waypoint’ message will appear. Since the unit will only alert
for one of the overlap points, use caution when navigating in these areas. If you enter an alarm circle
overlap, you will only be alerted to the closest proximity waypoint.
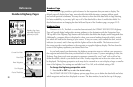
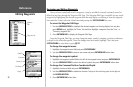
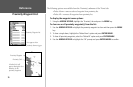
To add a proximity waypoint:
1. Use the ARROW KEYPAD to highlight an empty space on the Proximity list and press
ENTER/MARK. The ‘Find’ screen appears. Highlight ‘Waypoints’ and press ENTER/MARK.
2. To select a waypoint from the lists, use the ARROW KEYPAD to highlight the desired waypoint
from the ‘User’ or ‘Nearest’ tab lists.
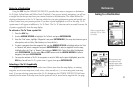
To select a waypoint from the map, highlight either the ‘User’ or ‘Nearest’ tab and press
MENU.
With ‘Select From Map’ highlighted, press
ENTER/MARK. Use the zoom IN and OUT buttons and
the ARROW KEYPAD to highlight a waypoint.
3. Press
ENTER/MARK to confirm. The distance field will now be highlighted.
4. Press
ENTER/MARK to begin entry of the proximity radius.
5. Use the ARROW KEYPAD to enter a distance value (to 99.99 units) and press
ENTER/MARK.
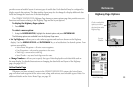
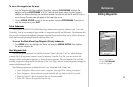
To turn proximity alarms on or off:
1. Use the ARROW KEYPAD to highlight the field below “Proximity Alarm” and press
ENTER/MARK.
2. Select the desired ‘ON’ or ‘OFF’ setting and press
ENTER/MARK.
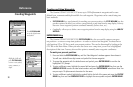
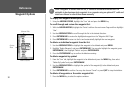
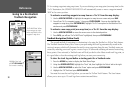
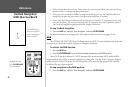
You can also search for a waypoint by name:
1. Highlight the name field and press ENTER/MARK.
2. Use the ARROW KEYPAD to select the first letter of
the name.
3. Move to the
RIGHT and enter the second letter if you do
not see it on the list below.
4. Repeat this until the name appears. Press
ENTER/MARK
when you see the name.
5. Highlight the name on the list and press
ENTER/MARK
again to review the waypoint. When done, highlight ‘OK’
and press
ENTER/MARK.
Name
Field
Waypoint
List