


54
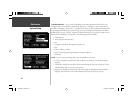
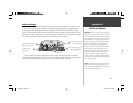
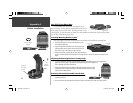
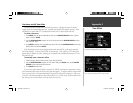
Non-Skid Friction Mount Base
The non-skid friction mount base is designed to fi t an
uneven surface. Each of the four weighted tabs can be bent to
fi t the shape of your vehicle’s dash. By fi tting the base to your
vehicle’s dash, you will maximize the contact area and minimize the likelihood that the bracket assem-
bly will slide when making sharp turns.
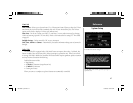
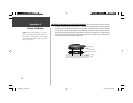
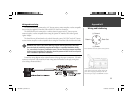
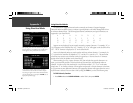
Attaching Mounting Bracket to Base
These steps apply to both the non-skid friction mount base and the adhesive mounting base.
1. Slide the locking lever on the mounting base, to the
left (unlocked position).
2. Attach the bracket assembly to the mounting base by
sliding the disk on the bottom of the bracket into the
base until it clicks into place (see fi gure at left).
3. Rotate the bracket assembly left or right until the desired
angle is achieved. Slide the locking lever to the right (lock) to secure the bracket assembly to the
base.
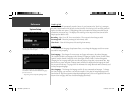
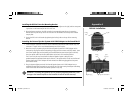
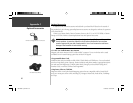
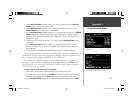
Adjusting the Mounting Bracket’s Viewing Angle
1. Tilt the StreetPilot III forwards or backwards by pressing and holding down on the adjustment
button on the back side of the bracket assembly (see fi gure at left). Adjust the
unit as desired and release the button.
2. Rotate the entire bracket assembly by sliding the locking lever to the left
(unlocked position). Adjust the angle as desired and move the lever back
(right) to the locked position.
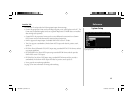
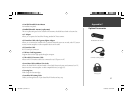
Removing the Bracket Assembly from the Base
1. Slide the locking lever, on the mounting base, to the left
(unlocked position).
2. Press the release tab downward and slide the bracket assembly to the right (see fi gure above).
Appendix A
Vehicle Installation
Unlock to adjust
left/right
Press
down to
adjust tilt
(unlocked)
Press down
to release
mounting base
weighted tabs
locking lever release tab
190-00256-10_0B.indd 54 1/13/2003, 10:34:17 AM