


53
Appendix A
Vehicle Installation
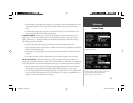
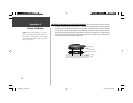
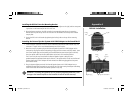
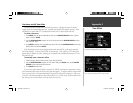
Installing the GPS Unit into the Mounting Bracket
1. Locate the tabs on the base/top of the mounting bracket (see fi gure to the right) and the correspond-
ing notches on the bottom/top of the GPS unit’s case.
2. Align the bottom notches on the GPS unit with the corresponding two tabs on the mounting
bracket base and push the top of the GPS unit back into the bracket until the top notch and tab
snap in place.
3. Secure the GPS unit in the bracket by tightening the locking knob on the top of the mounting
bracket.
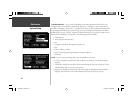
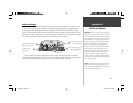
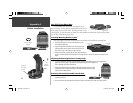
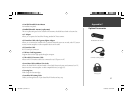
Attaching the External Speaker System with 12VDC Adapter to the StreetPilot III
1. Locate the power connector on the rear of the StreetPilot III (behind the rubber weather cap). The
connector is “keyed” with a notch located between two of the four pins.
2. Mate the round, 4-pin power plug on the External Speaker System with 12VDC Adapter to this
connector by aligning the notches and pushing the plug into the connector until fully seated. Insert
the 2.5mm speaker plug into the speaker jack located below the antenna (see fi gure to the left).
Press the speaker cable into the two cable holders on the back of the mounting bracket.
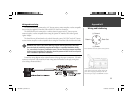
The 2.5mm mini-jack may be used with the External Speaker System or with your own
speaker/headphone (unpowered and rated at 8 ohms). The speaker which is built into the External
Speaker System with 12VDC Adapter will work without the cable being plugged into the power
source of the vehicle.
3. Plug the cigarette lighter portion of the External Speaker System with 12VDC Adapter into an
available cigarette lighter receptacle in your vehicle. Use care when routing the adapter cable being
certain that it does not interfere with vehicle operation in any way.
WARNING: Connecting the StreetPilot III to an externally amplifi ed speaker may cause
damage to the internal amplifi er on the StreetPilot III and will void the warranty.
,
Mounting Bracket
speaker cable holders
speaker plug
locking
knob
power
connector
locking
knob
top tab
bottom tabs
190-00256-10_0B.indd 53 1/13/2003, 10:34:15 AM