


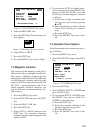
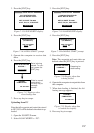
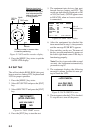
8-2
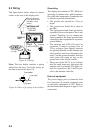
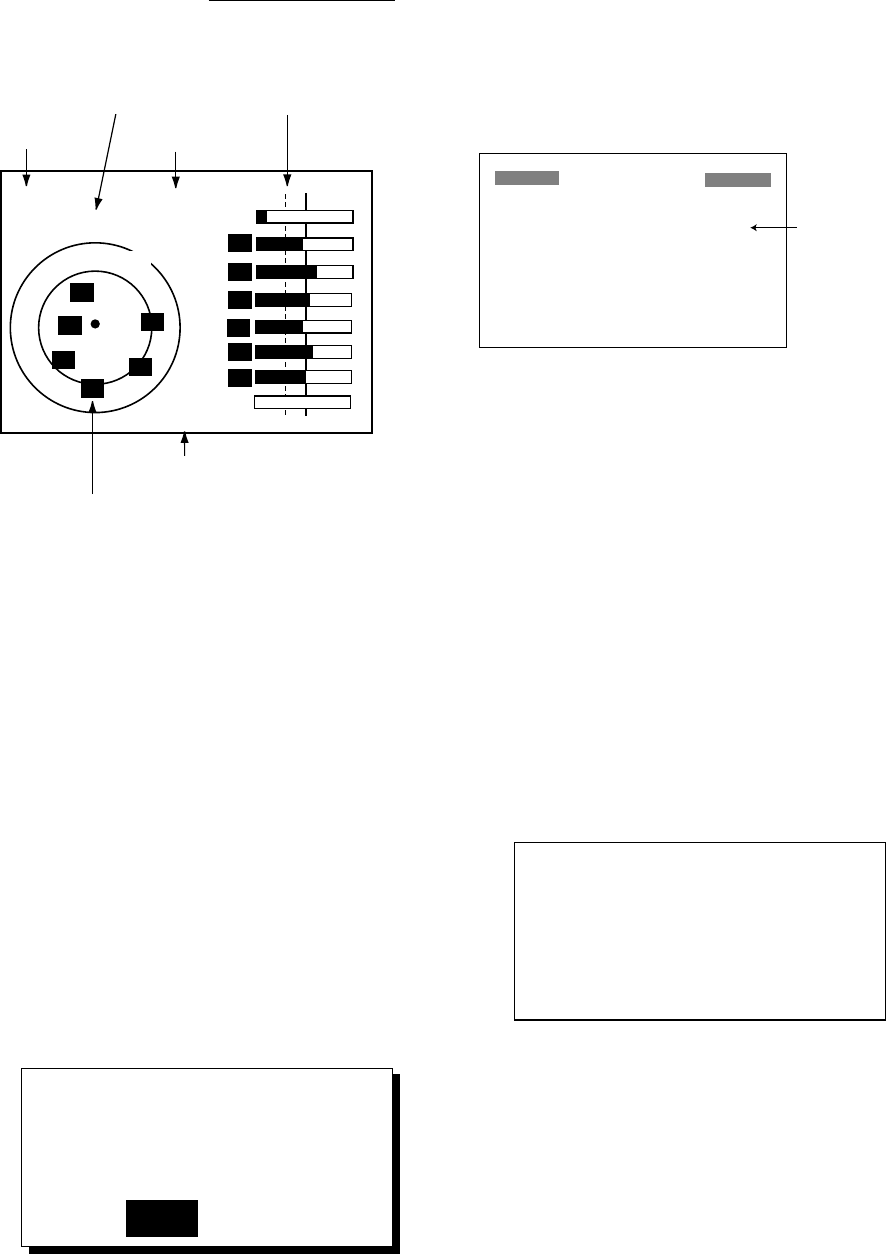
2D
N
DOP
1. 5
02
DOP value
Satellite number in reverse video
is used for positionin
g
.
09
11
17
04
06
14
– –
02
04
06
09
11
14
17
Altitude
North
GPS fix
state
Receive signal level
Bars show signal level.
Satellites whose signal
level extends past the
dashed line are used
in fixing position.
85m
Figure 8-2 GPS satellite monitor display
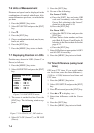
4. Press the [MENU] key twice to quit the
SATELLITE display.
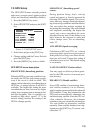
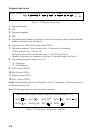
8.4 Self Test
The self test checks ROM, RAM, data port,
beacon receiver, battery, RTC, keyboard and
LCD for proper operation.
1. Press the [MENU] key twice.
2. Select SYS SETUP and press the [ENT]
key.
3. Select SELF TEST? and press the [ENT]
key.
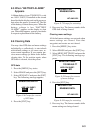
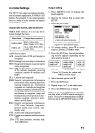
TEST START ?
(STOP: PWR OFF)
ARE YOU SURE ?
YES NO
Figure 8-3 TEST START screen
4. Press the [ENT] key to start the test.
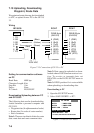
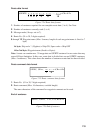
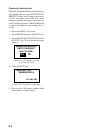
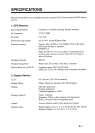
5. The equipment tests devices, data port,
beacon receiver, battery and RTC. The
results are individually displayed as OK
or NG (No Good). (NONE appears next
to BEACON when no beacon receiver
is connected.)
SELF TEST
ROM : OK
RAM : OK CNT=001
DATA2 : OK
BEACON : OK
BATTERY : OK
RTC : OK
205-1111-XXX (STOP: PWR OFF)
No. of
consecutive
tests
Figure 8-4 SELF TEST display
6. After the equipment has checked the
items mentioned in step 5, a beep sounds
and the message PUSH KEY appears.
7. Press each key one by one. The name of
the key pressed momentarily appears at
the lower right-hand corner if the key is
functioning properly.
Note: If no key is pressed within several
seconds, the equipment automatically
proceeds to step 8.
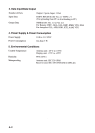
8. The equipment displays the following
message to inform you that it is now go-
ing to check the LCD:
<LCD CHECK>
ALL ON 2 SEC.
ALL OFF 3 SEC.
Figure 8-5 LCD CHECK screen
9. The test repeats after the LCD is checked.
To stop the test, turn off the power.