


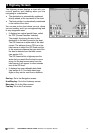

23TRACKER950 CHARTPLOTTER Installation and Operation Manual
NAVMAN
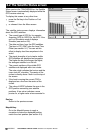
6-2-1 Introduction to routes
A route is a list of waypoints that the boat can
navigate along. Routes can be created, changed
and deleted.
A route can have between two and fifty waypoints.
A route can start and stop at the same waypoint;
in this case there must be three or more waypoints
in the route.
The boat can start at any waypoint in the route
and can travel along a route in either direction.
Waypoints on the route can be skipped.
Routes are a particularly powerful feature when
the TRACKER950 is connected to an autopilot,
allowing the vessel to be automatically guided
along the route.
Make sure that any routes that you create do not
cross land or any dangerous water.
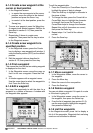
6-2-2 Routes screen
To display the Routes screen:
1 Go to the Navigation screen.
2 Press the Routes key.
The softkeys available in the Routes screen are
different if the boat is navigating along a route or
not:
If the boat is not navigating a route, the
softkeys are:
TxtCrt: Create a new route by selecting
waypoints from a list (see section 6-2-3).
Create: Create a new route by selecting
waypoints from a chart (see section 6-2-
4).
List: Display a list of the routes (see
section 6-2-5).
If the boat is navigating a route, the softkeys
are:
RteOff: Stop navigating along the route.
List: Display a list of the routes, see
section 6-2-5).
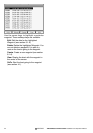
6-2-3 Create a new route by
selecting waypoints from a list
1 In the routes screen, press the TxtCrt key to
display a new, empty route list.
2 The route is given a default name. To
change the name, press the Edit key and
use the cursor keys to change the name,
then press the Enter key.
3 To add a waypoint to the route, press the
CursorUp or CursorDown keys to move the
highlight up or down the route to where you
want to add the waypoint.
Press the Insert key. A list of waypoints is
displayed. Press the CursorUp or
CursorDown keys to move the highlight to
the waypoint, then press the Enter key.
4 To delete a waypoint from the route, press
the CursorUp or CursorDown keys to move
the highlight to the waypoint.
Press the Delete key.
5 Repeat this process until the route is
finished. Press the Done key to save the
new route.
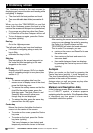
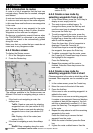
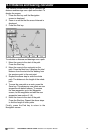
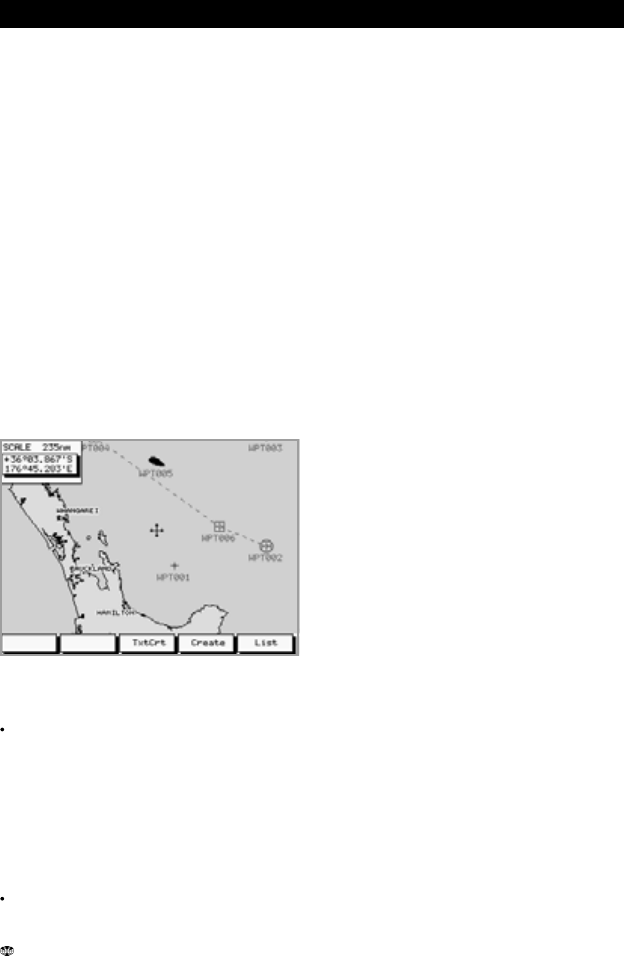
6-2-4 Create a new route by
selecting waypoints from a chart
Choose waypoints in the order in which they will be
traversed. New waypoints can be created as you
go.
1 In the routes screen, press the Create key.
2 Move the cursor to the start of the route.
3 Press the Add key.
If the cursor is over an existing waypoint it is
added to the route.
If the cursor is not over an existing waypoint,
it creates a new waypoint there and displays
a window of data for the waypoint. You can
edit this as described in section 6-1-6, then
press the Save key. The waypoint is added
to the route.
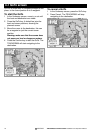
4 Repeat the step above to add the remaining
waypoints to the route.
Press the Undo key to remove the last
waypoint from the route.
5 When the route is finished, press the Save
key.
6 It gives the route a default name. Use the
6-2 Routes