43
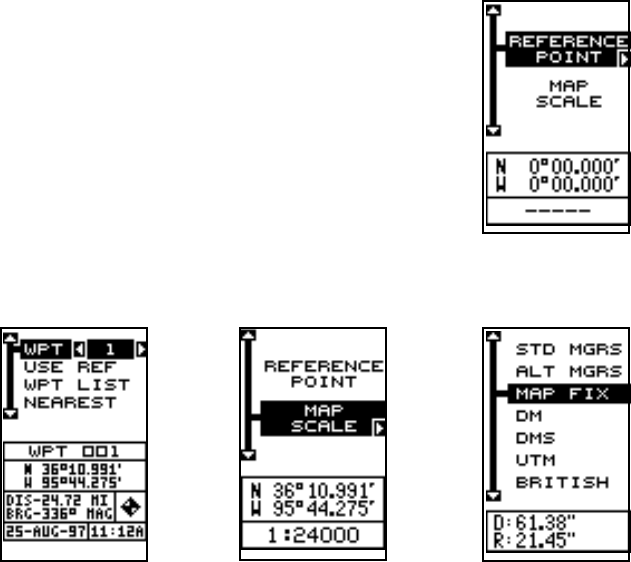
and press the right arrow key. The screen at right ap-
pears. Reference Point is highlighted. Press the right
arrow key. The screen below left appears. Select the
waypoint number that you saved the reference point
under. Highlight the Use Ref label and press the right
arrow key. The unit returns to the Map Fix Setup menu.
Now highlight the Map Scale label and press the right
arrow key. Enter the map’s scale. This is generally at
the bottom of the map. It’s shown as a ratio, for ex-
ample 1:24000. In this example, we entered 24000 as
a map scale. (Ignore the 1:) The unit returns to the
Map Fix Setup screen.
Finally, press the EXIT key to erase this menu. Now highlight the Position
Format label and press the right arrow key. Select Map Fix from the list
and press the EXIT key. All position information now shows as a distance
from the reference point you entered and saved as a waypoint earlier.
Alternate Format
Windows group I has two position screens. You can change the format of
each position display independently. For example, the position at the top
of the screen can show latitude/longitude while the one at the bottom
shows map fix. Use the position format to set the format for the top dis-
play, and Alternate Format to set the bottom display. The alternate format
screen is identical to and adjusts the same as the position format screen.
Note: The alternate format only affects the second position window on
group I. The main position format affects all position displays on all win-
dows, navigation, and plotter screens.


