28
sition and change it using the up and down arrow keys. When you’re ready
to save this position and return to the waypoint screen, press the ENT
key. Press the EXIT key to erase the menus and return to the navigation,
plotter, or windows screen. Note: You can also use this method to change
the position of an existing waypoint.
Edit Icon
To change the icon assigned to a waypoint, first select
the waypoint, then choose OPTIONS from the way-
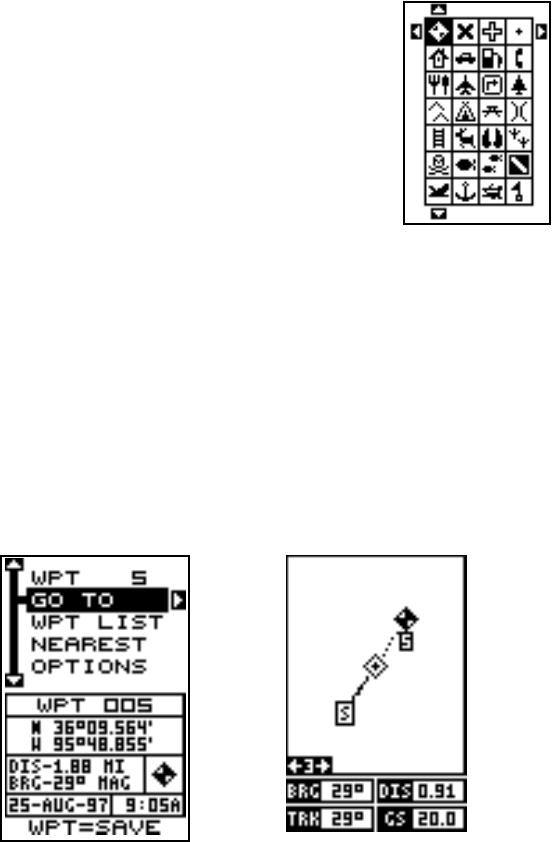
point menu. Now select the Symbol Edit menu. The
screen at right appears. Use the arrow keys to select
the icon that you want to assign to the waypoint, then
press the ENT key. The waypoint now has the new icon.
WAYPOINT NAVIGATION
The GlobalNav 212 makes it easy to navigate to any waypoint. All you
have to do is select the waypoint (see page 26), then highlight the “GO
TO” label on the waypoint screen and press the right arrow key. The unit
immediately shows navigation information to the waypoint on all naviga-
tion, plotter, and windows screens.
In this example, waypoint number 5 was recalled. Switching to a plotter
number two screen (shown at right) shows the starting location “S”, the
recalled waypoint “5”, the plot trail from the starting location to the present
position, and the present position.
