4 - 24
CHAS
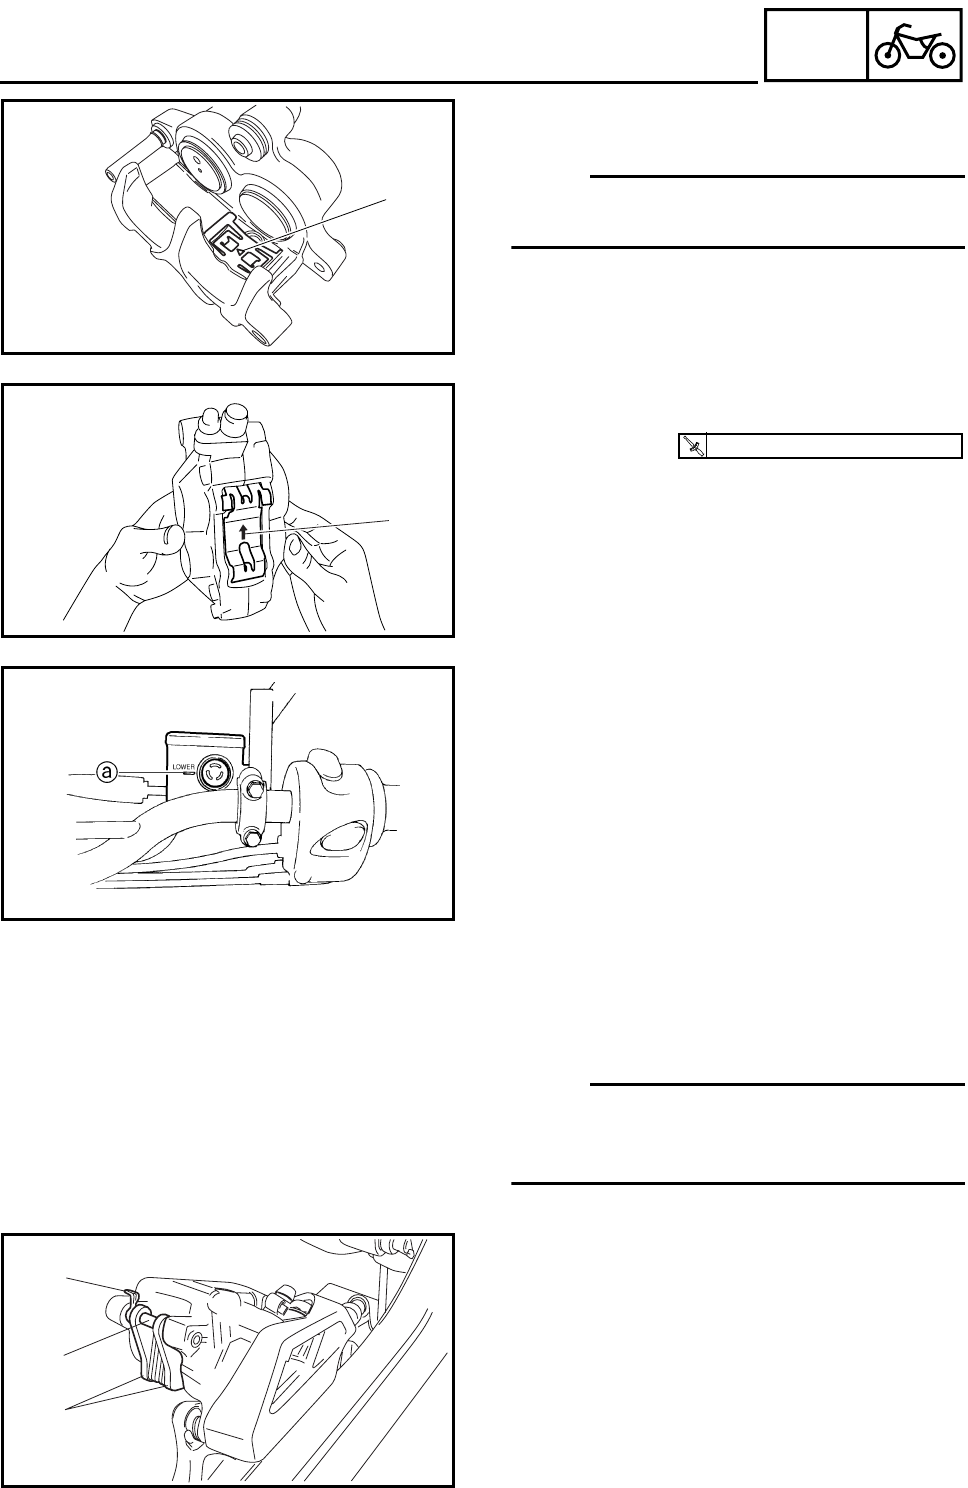
d. Install new brake pads and new brake pad
springs.
NOTE:
_
The arrow a on the brake pad spring must
point in the direction of rotation.
È
XT660R
É
XT660X
▲▲▲▲ ▲ ▲▲▲▲ ▲ ▲▲▲▲ ▲ ▲▲▲▲ ▲ ▲▲▲▲ ▲ ▲▲▲▲ ▲▲▲
5. Install:
• brake pad pin
• brake pad clip
• brake caliper
6. Check:
• brake fluid level
Below the minimum level mark a → Add
the recommended brake fluid to the proper
level.
Refer to “CHECKING THE BRAKE FLUID
LEVEL” in chapter 3.
7. Check:
• brake lever operation
Soft or spongy feeling → Bleed the brake
system.
Refer to “BLEEDING THE HYDRAULIC
BRAKE SYSTEM” in chapter 3.
EAS00583
REPLACING THE REAR BRAKE PADS
NOTE:
_
When replacing the brake pads, it is not neces-
sary to disconnect the brake hose or disas-
semble the brake caliper.
1. Remove:
• rear wheel
• brake caliper
Refer to “REAR WHEEL, BRAKE DISC,
AND REAR WHEEL SPROCKET”.
2. Remove:
• brake pad clip 1
• brake pad pin 2
• brake pads 3
• brake pad springs
a
È
a
É
T
R
.
.
40 Nm (4.0 m · kg, 29 ft · lb)
1
2
3
FRONT AND REAR BRAKES


