


98
Appendix A
Proper transducer installation is key to getting the best performance from your new unit. If the
transducer lead is too short, extension cables are available from your Garmin dealer. DO NOT cut the
transducer lead or any part of the transducer cable, as this voids your warranty. The cable cannot be
spliced and connected to any existing (Garmin or non-Garmin) transducer cables.
Following are some tips and basic installation instructions for some popular transducers. Detailed
installation instructions are provided in the transducer kits. Some transducers may need to be installed
by a professional marine installer.
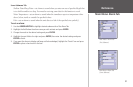
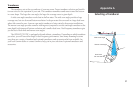
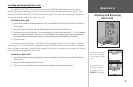
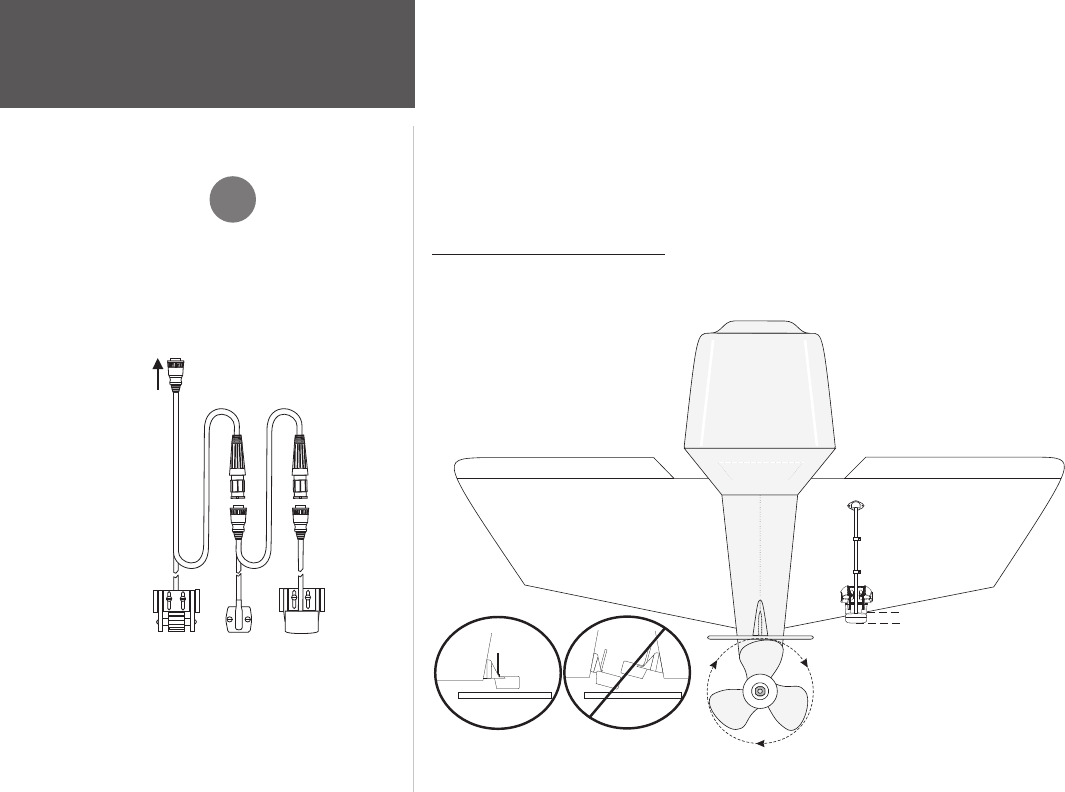
Transom Mount Installation
Transom Mount Transducer (depth/temp)
Mounting the Transducer
I
DO NOT mount the transducer behind strakes, struts,
fittings, water intake or discharge ports, or anything that
creates air bubbles, or causes the water to become turbulent.
It is important that the transducer be in clean (non-turbu-
lent) water for optimal performance.
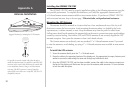
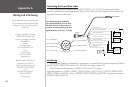
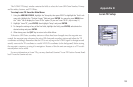
Speed Temp Transducer
To Unit
Additional Sensor Installation
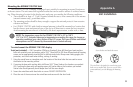
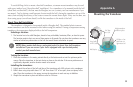
Donotmounttransducerdirectly inthe
pathoftheprop. Thetransducercancause
cavitationthatmaydegradetheboat'sperformance
anddamagetheprop.
Makesurethatthetransduceris
belowwaterlevelwhentheboat
isonplaneat highspeed
Apply marine sealant to all
screw threads to prevent water
from seeping into the transom.
Mountthetransducercablecover
wellabovethewaterline.
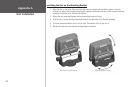
Transducershouldextend1/8"(3mm)below
fiberglasshullor3/8" (10mm)belowaluminumhull
OK
Mountthetransducerparallelwiththe bottom.