


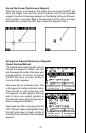
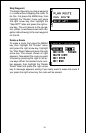
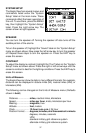

33
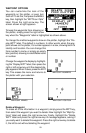
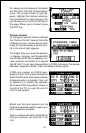
The black box is on the “Route # 1” label. If this isn’t the route you want to
use, press the right or left arrow keys to switch to another one. Before
starting the route, you’ll need to decide if you want to start at the begin-
ning and travel forward or start at the last waypoint in the route and travel
backwards (reverse) to the first waypoint. The default is forward. Next,
highlight the “Start Route” label and press the right arrow key. The screen
shown below appears.
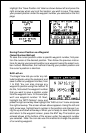
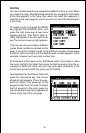
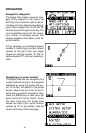
Once you determine which direction in
the route you want to go, you’ll need to
determine the first waypoint in the list you
want to start the route. Usually, it’s the
first waypoint, however the Eagle View
gives you several options. The default
starting waypoint is the first one in the
list. However, by pressing the right ar-
row key, the word “AUTO” appears in the
“Select First WPT” list. This starts the
route with the waypoint that’s closest to your present position. You can
start at any waypoint in the route. As you change the number, the se-
lected starting waypoint is highlighted on the list.
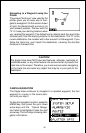
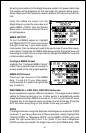
If you want to see details about the highlighted waypoint, press the WPT
key.
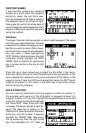
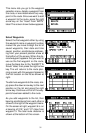
When you have everything on this screen
set as desired, press the ENT key to start
the Eagle View navigating to the first
waypoint on the route.
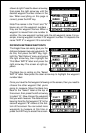
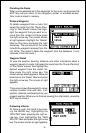
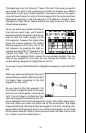
As you travel to the first waypoint, the
unit shows navigation data to the way-
point. If you use the plotter, as shown at
right, the unit draws a dotted line from
your starting position (shown by the “S”),
and a dashed line from the first waypoint to each of the other waypoints in
the route. When you enter the radius set by the arrival alarm, the Eagle
View automatically switches to the next waypoint on the list, showing navi-
gation data to that waypoint, and so on until the last waypoint on the route
list has been reached. (Note: The arrival alarm does not have to be turned
on in order to use the route feature.)