


40
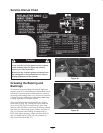
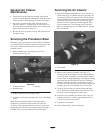
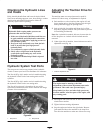
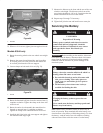
3. Slightly raise oil coolers and pivot forward (Fig. 54).
Clean both sides of oil coolers and radiator area
thoroughly with compressed air. Pivot oil coolers back
into position.
2
1
3
Figure 54
1. Reel oil cooler
2. Radiator
3. Transmission oil cooler
4. Install screen and close hood.
Servicing the Engine Belts
Check condition and tension of all belts after first day of
operation and every 100 operating hours thereafter.
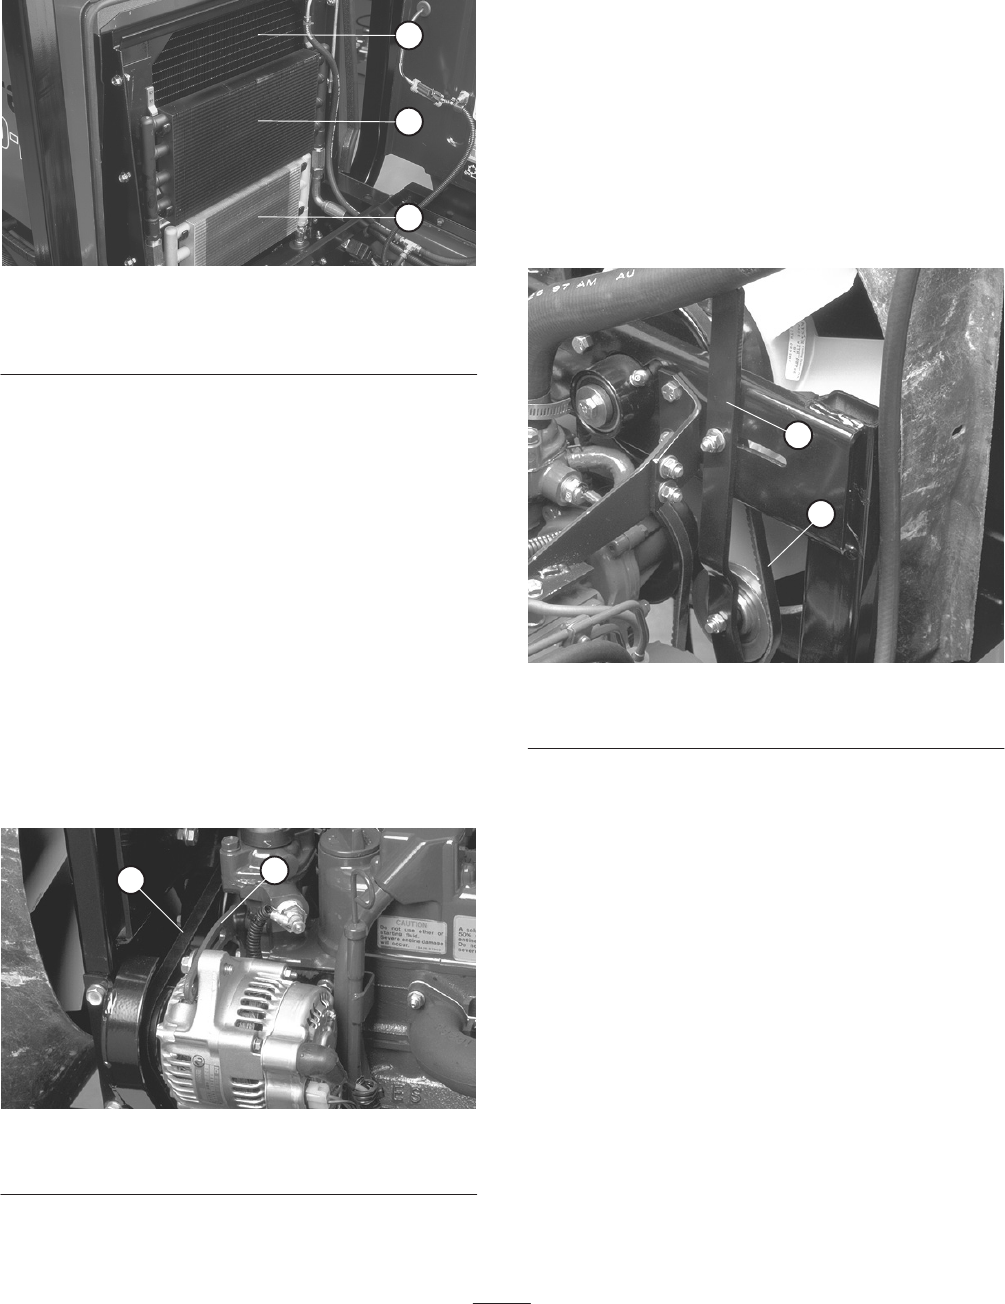
Alternator Belt
To Check Tension:
1. Open hood.
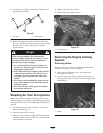
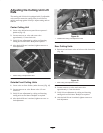
2. Check tension by depressing belt (Fig. 55) midway
between alternator and crankshaft pulleys with 22 lb. of
force. Belt should deflect 7/16 in. If deflection is
incorrect, proceed to step 3. If correct, continue
operation.
1
2
Figure 55
1. Alternator belt 2. Brace
3. Loosen bolt securing brace to engine (Fig. 55) and bolt
securing alternator to brace.
4. Insert pry bar between alternator and engine and pry out
on alternator.
5. When proper tension is achieved, tighten alternator and
brace bolts to secure adjustment.
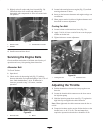
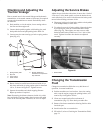
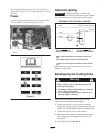
Cooling Fan Belt
1. Loosen locknut on belt tensioner lever (Fig. 56).
2. Apply 5–10 lb. of force at end of lever to set the proper
tension on the fan belt.
3. Tighten locknut to secure adjustment.
1
2
Figure 56
1. Cooling fan belt 2. Tensioner lever
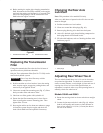
Adjusting the Throttle
1. Position throttle lever forward so it stops against seat
base slot.
2. Loosen the throttle cable connector on the lever arm at
the injection pump.
3. Hold the injection pump lever arm (Fig. 57) against the
high idle stop and tighten the cable connector.
Note: When tightened, the cable connector must be free to
swivel.
4. Torque the locknut, used to set the friction device on the
throttle lever, to 40–55 in.-lb. The maximum force
required to operate the throttle lever should be 20 lb.