


16
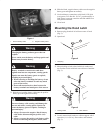
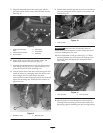
5. Adjust latch bracket, until aligned with switch latch,
then tighten capscrews.
6. Rotate latch to locked and unlocked position with key.
Remove key and store in memorable place.
7. Close hood.
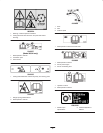
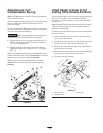
Replacing the Panel Fasteners
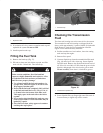
1. Remove fasteners securing left front corner of floor
panel and left end of access panel to frame (Fig. 4).
1
2
Figure 4
1. Floor panel 2. Access panel
2. Replace floor panel fastener with flange head capscrew
(5/16 x 5/8 in.) supplied in loose parts (Fig. 4).
3. Replace access panel fastener with flange head
capscrew (5/16 x 3/4 in.) supplied in loose parts
(Fig. 4).
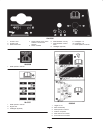
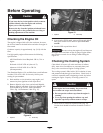
Checking the Tire Pressure
The tires are over-inflated for shipping. Therefore, release
some of the air to reduce the pressure. Correct air pressure
in the front and rear tires is 10–15 psi.
Important Maintain even pressure in all tires to ensure
uniform contact with turf.
Installing the Cutting Units
1. Remove cutting units from cartons. Assemble and
adjust per the Operator’s Manual for the cutting unit.
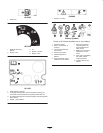
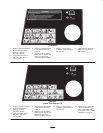
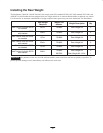
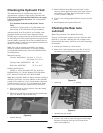
2. If baskets will be installed, use chart below (Fig. 5) to
determine locations at which basket guides or basket
brackets must be mounted to cutting unit carrier frames.
If baskets are not to be installed, proceed to step 5.
L.H.
FRONT
L.H.
REAR
R.H.
FRONT
R.H.
REAR
CENTER
BASKET
BRACKET
BASKET
GUIDE
BASKET
GUIDE
BASKET
GUIDE
BASKET
GUIDE
BASKET
BRACKET
BASKET
BRACKET
BASKET
BRACKET
Figure 5
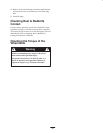
3. Mount a basket guide (Fig. 6) to the appropriate side of
each cutting unit carrier frame (see Figure 7) with a
capscrew (5/16 x 1-3/4 in.), flat washer, and lock
washer or fasteners previously removed, as shown in
Figure 6.
1
2
Figure 6
1. Carrier frame 2. Basket guide
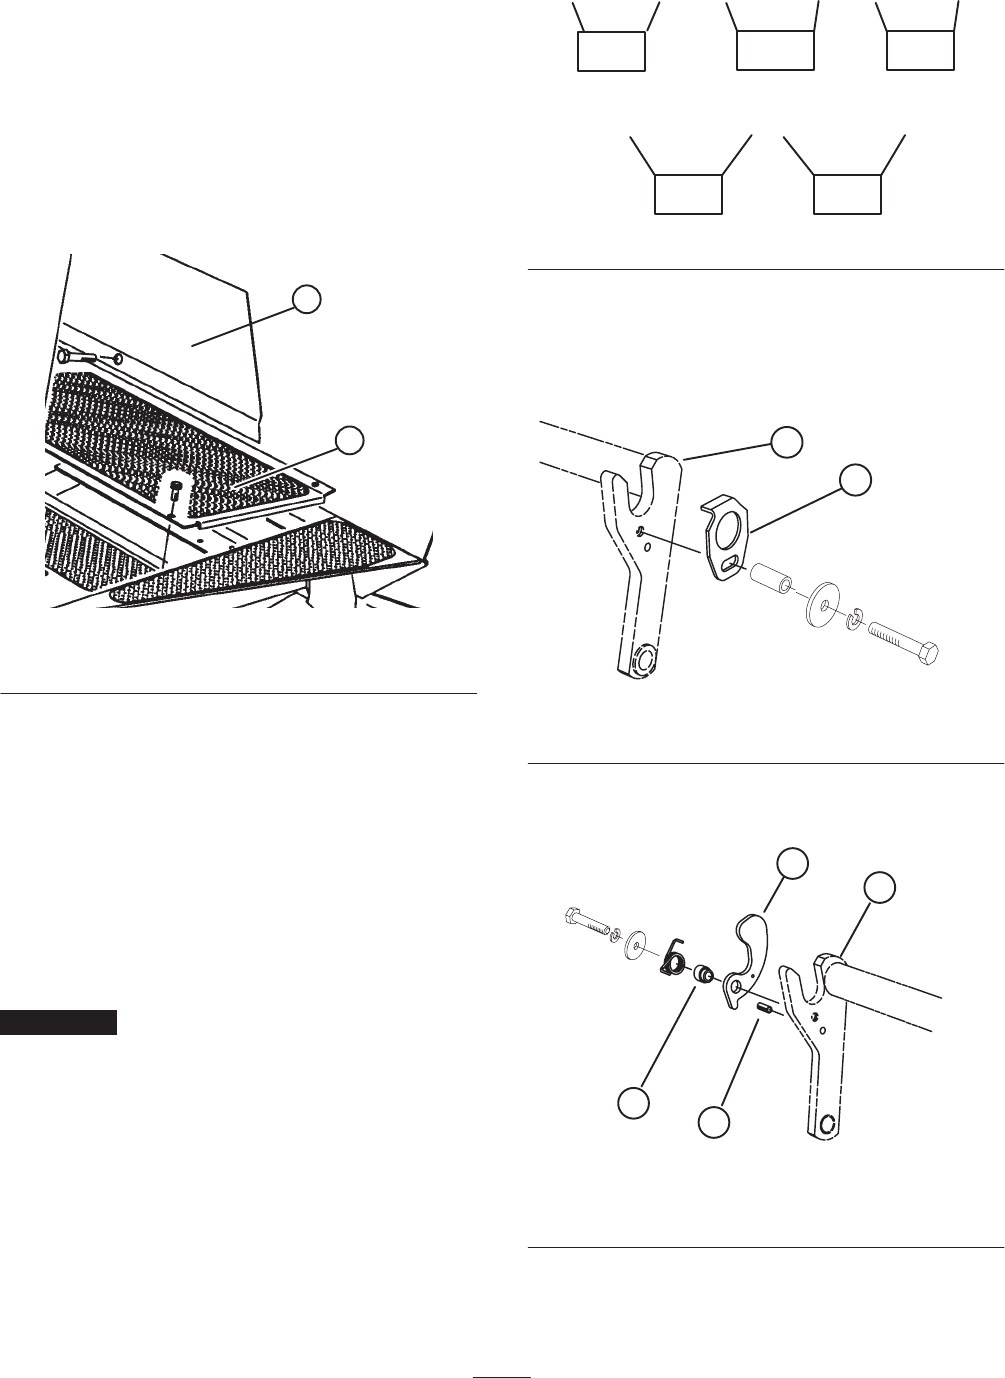
4. Install a roll pin (Fig. 7) into hole in appropriate side of
each cutting unit carrier frame (Fig. 5).
1
2
3
4
Figure 7
1. Carrier frame
2. Roll pin
3. Basket bracket
4. Basket collar