


Flat tire
315
on the spare wheel of your vehicle may be
of a different color.
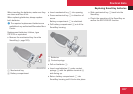
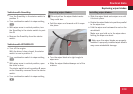
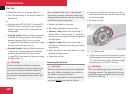
1
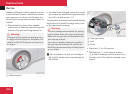
Buckle
2
Clip
X
Press on both clips 2 simultaneously to
release buckle 1.
X
Store the tensioning straps in a safe place.
You will need them to store the spare wheel
in the trunk after use.
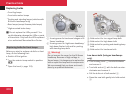
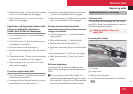
Lifting the vehicle
G
Warning!
When jacking up the vehicle, only use the
jack which has been specifically approved
by Mercedes-Benz for your vehicle.
The jack is designed exclusively for jacking
up the vehicle at the jack take-up brackets
built into both sides of the vehicle. Make
sure the jack arm is fully seated in the jack
take-up bracket. The jack must always be
vertical when in use, especially on inclines
or declines.
The jack is intended only for lifting the vehi-
cle briefly for wheel changes. It is not suited
for performing maintenance work under
the vehicle. To help avoid personal injury,
use the jack only to lift the vehicle during a
wheel change.
Never get beneath the vehicle while it is
supported by the jack. Keep hands and feet
away from the area under the lifted vehicle.
Always lower the vehicle onto sufficient
capacity jackstands before working under
the vehicle.
Always firmly set the parking brake and
block the wheels with wheel chocks or
other sizeable objects before raising the
vehicle with the jack. Do not disengage the
parking brake while the vehicle is raised.
Make sure that the ground on which the
vehicle is standing and where you place the
jack is solid, level and not slippery. If nec-
essary, use a large underlay. On slippery
surfaces, such as tiled floors, you should
use a non-slip underlay, for example a rub-
ber mat.
Do not use wooden blocks or similar
objects to support the jack. Otherwise the
jack may not be able to achieve its load-
bearing capacity if it is not at its full height.
Never start the engine when the vehicle is
raised.
Also observe the notes on the jack.
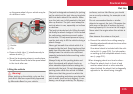
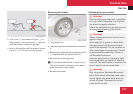
X
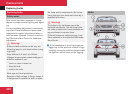
Prevent the vehicle from rolling away by
blocking wheels with wheel chocks or other
sizeable objects.
One wheel chock is included with the vehi-
cle tool kit (Y page 250). For information
on setting up the collapsible wheel chock,
see (Y page 251).
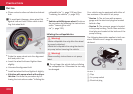
When changing wheel on a level surface:
X
Place the wheel chock in front of and
another wheel chock or other sizeable
object behind the wheel that is diagonally
opposite to the wheel being changed.
Practical hints
Z