


67
during the trip, such as the time to your destination. The other requires
only three key strokes and provides a full range of navigation data. Try
both methods and see which you prefer. When hiking at walking speed,
we often just use visual back trailing because it is better at following each
little turn on a foot path. At faster speeds, whether cruising at 120 kts or
zipping down the highway, the Navigate Trail command is handy.
Visual Back Trailing
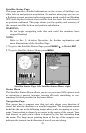
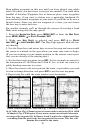
1. On the Map Page, zoom (ZIN or ZOUT) so your flashing trail is visible.
2. Begin moving and watch the Map Page (or Navigation Page, if you
prefer). Simply walk or steer so that your current position arrow traces
along the trail you have just made.
Navigate a Back Trail
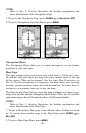
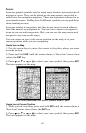
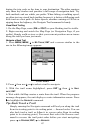
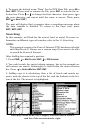
1. Press MENU|MENU|↓ to MY TRAILS|ENT and a screen similar to the
one in the following image appears.
Trails Menu.
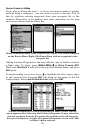
2. Press ↓ then use ↓ or ↑ to select a trail to navigate.
3. With the trail name highlighted, press
ENT|→ then ↓ to NAVI-
GATE
|ENT.
4. Wait while AirMap creates a route from the trail. When the progress
message disappears, the unit displays a route information screen. Press
↓ to highlight the
NAVIGATE command.
Tip: Back Track a Trail
Simply running the Navigate command will lead you along the trail
from its starting point to its ending point — forward order. You can
also back track a trail, or follow it in reverse order (from its ending
point to its starting point.) You must first select the Reverse com-
mand to reverse the trail point order before you start navigating:
press → to
REVERSE|ENT|← to NAVIGATE.